Angular and Docker
Docker is a software platform for quickly building, testing, and deploying applications. It enables you to separate your apps from your infrastructure to deliver software faster. Creating a Docker container is relatively easy, and there are many ways to do it.
You’ll learn how to use a Dockerfile to create an image for your Angular app and deploy it to Heroku. Then, I’ll show how to combine Angular and Spring Boot into the same JAR artifact for deployment. You’ll learn how to Dockerize the combined apps using Jib and Cloud Native Buildpacks. Finally, I’ll show you how to deploy your Docker image to Heroku and Knative on Google Cloud.

Docker is the most popular way to build and share containers. Dockerizing involves packaging your app—you can also include web servers to serve up your app. This is important when containerizing an Angular app because its artifacts are just JavaScript, CSS, and HTML; the production app is static files that will need to be served up by a web server. As a bonus, you can configure the web server to send security headers that make your app more secure.
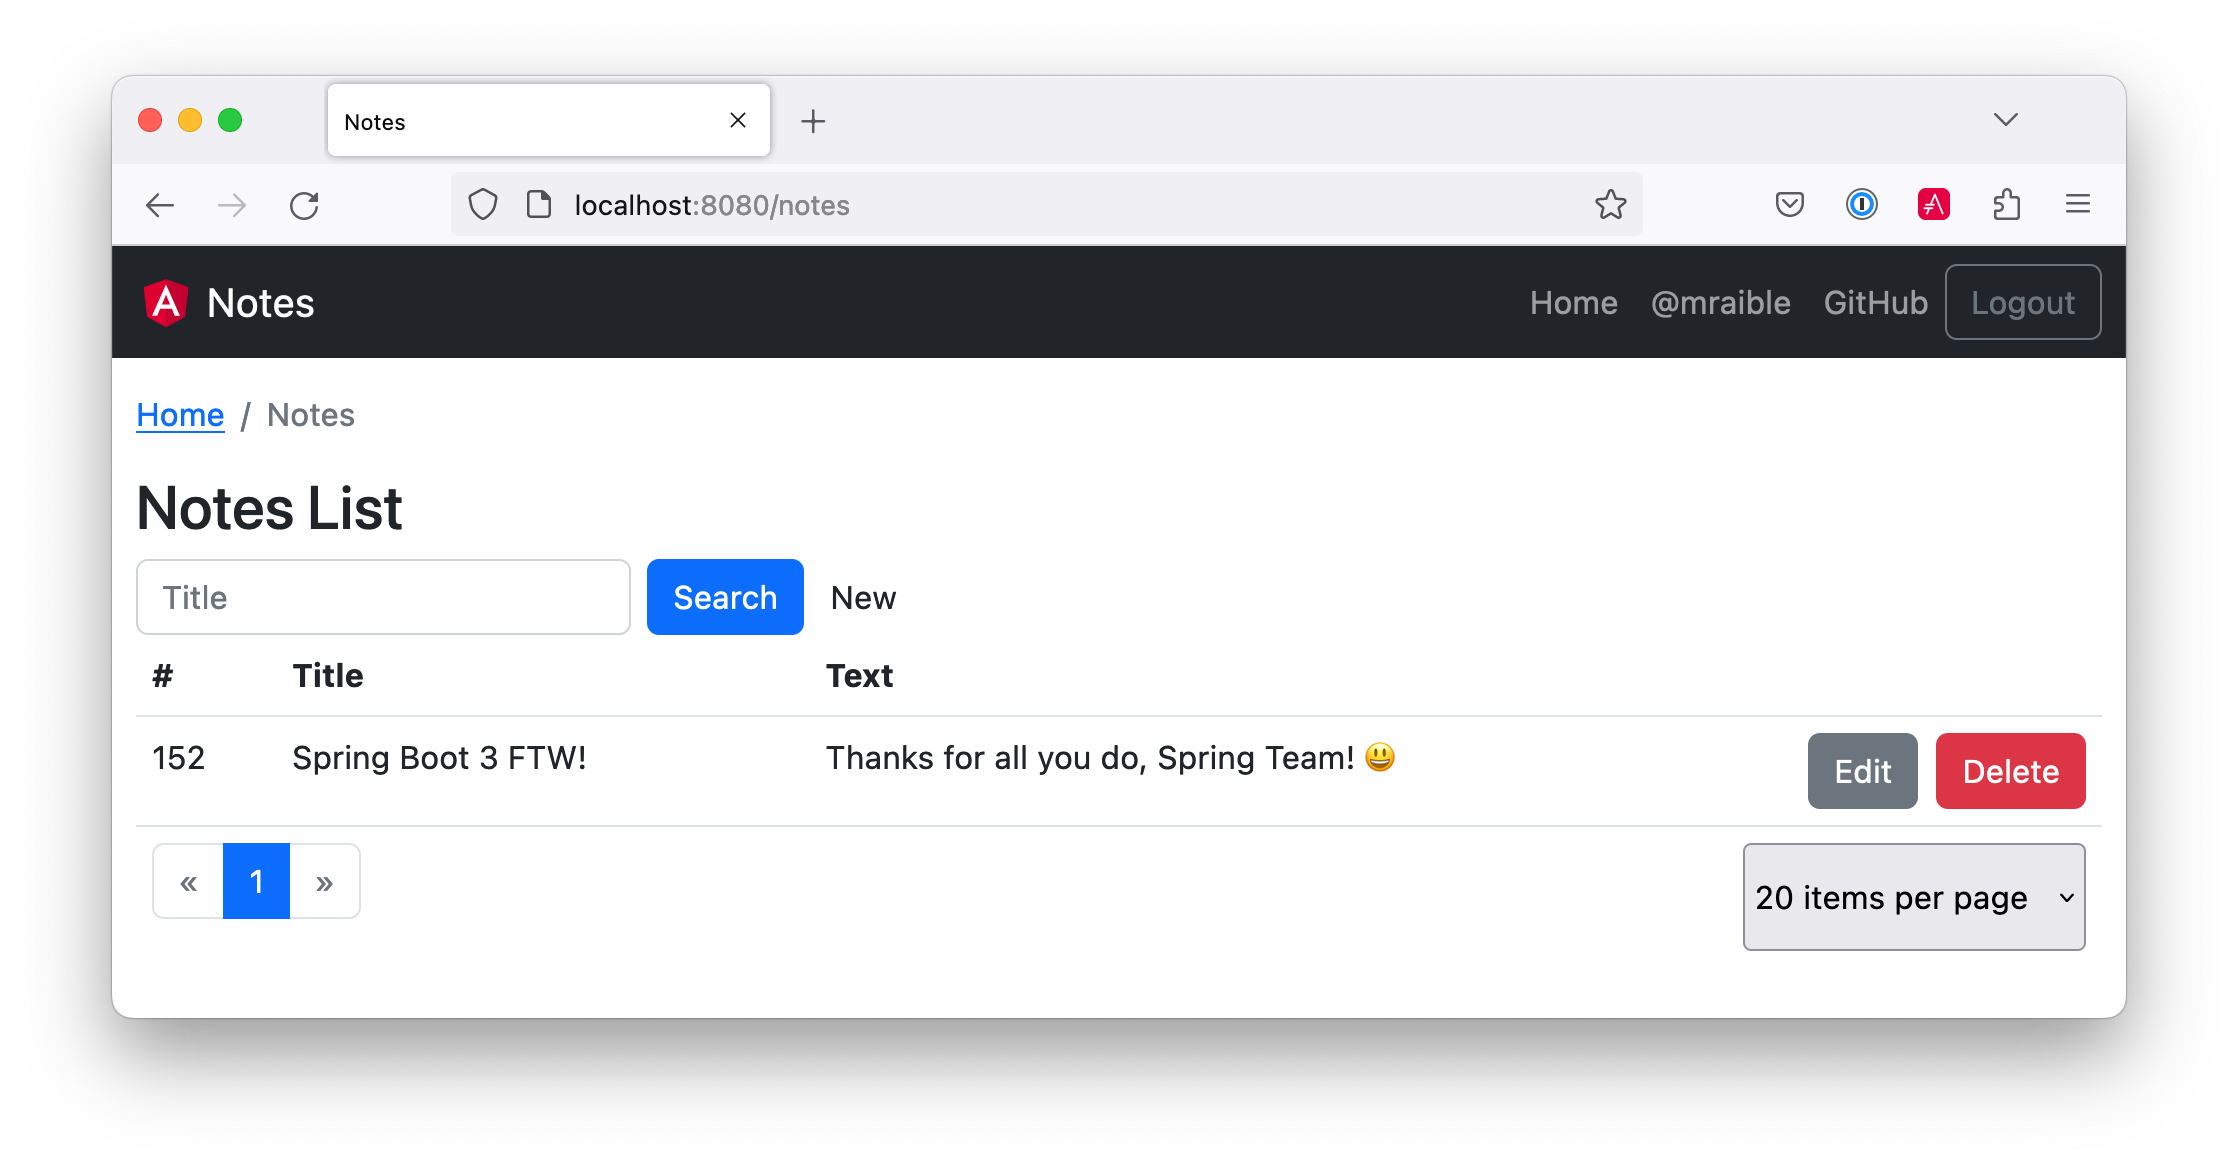
If you’re following along, you should have an angular-deployment directory with an Angular and a Spring Boot app in it. It’s a note-taking app that uses Kotlin and Spring Boot on the back end and Angular on the front end. It’s secured with OpenID Connect (OIDC).
If you’d rather start from this point, download the examples for this book from InfoQ. The angular-deployment directory has the previous section’s completed example. Copy it to angular-docker in your favorite code location.
If you don’t have Docker installed, you can download it from docker.com.
Dockerize an Angular App
Create a notes/Dockerfile that uses Node.js as a base image and Nginx as a web server.
FROM node:18-alpine AS builder

WORKDIR /opt/web
COPY package.json package-lock.json ./
RUN npm install

ENV PATH="./node_modules/.bin:$PATH"

COPY . ./
RUN ng build

FROM nginx:1-alpine
COPY nginx.config /etc/nginx/conf.d/default.conf
COPY --from=builder /opt/web/dist/notes /usr/share/nginx/html|
When I was trying to get everything to work, I found it handy to comment out the This allows you to skip the lengthy Angular build process. |
This will build your project and add Nginx as a web server. You must create the nginx.config file to make Nginx SPA-aware.
server {
    listen   80;
    server_name  _;

    root /usr/share/nginx/html;
    index index.html;

    location / {
        try_files $uri /index.html;
    }
}
Make sure your Docker daemon is running with docker ps. Then run the following command to build your Docker image. The ng-notes value can be whatever you want to name your image.
docker build -t ng-notes .If it builds successfully, you’ll see messages like the following:
writing image sha256:66c56e72ce719...
naming to docker.io/library/ng-notes
You can run it locally on port 4200 using the docker run command.
docker run -p 4200:80 ng-notesAdd these Docker commands as scripts to your package.json file.
"docker": "docker build -t ng-notes .",
"ng-notes": "docker run -p 4200:80 ng-notes"
The docker run command will serve up the production version of the Angular app, which should already have its back end configured to point to your Heroku app. You should have deployed your Spring Boot app to Heroku in the previous chapter.
export const environment = {
  production: true,
  apiUrl: 'https://<your-heroku-app>.herokuapp.com'
};
Since this runs the production build, you must add http://localhost:4200 as an allowed origin in your Spring Boot app on Heroku. Run the following command to make this happen.
heroku config:edit --app <your-heroku-app>Append the URL to your existing ones, separating them with a comma.
ALLOWED_ORIGINS='...,http://localhost:4200'| One advantage of doing this is that you can run your local Angular app against your production back end. I’ve found this very useful when debugging and fixing UI issues caused by production data. |
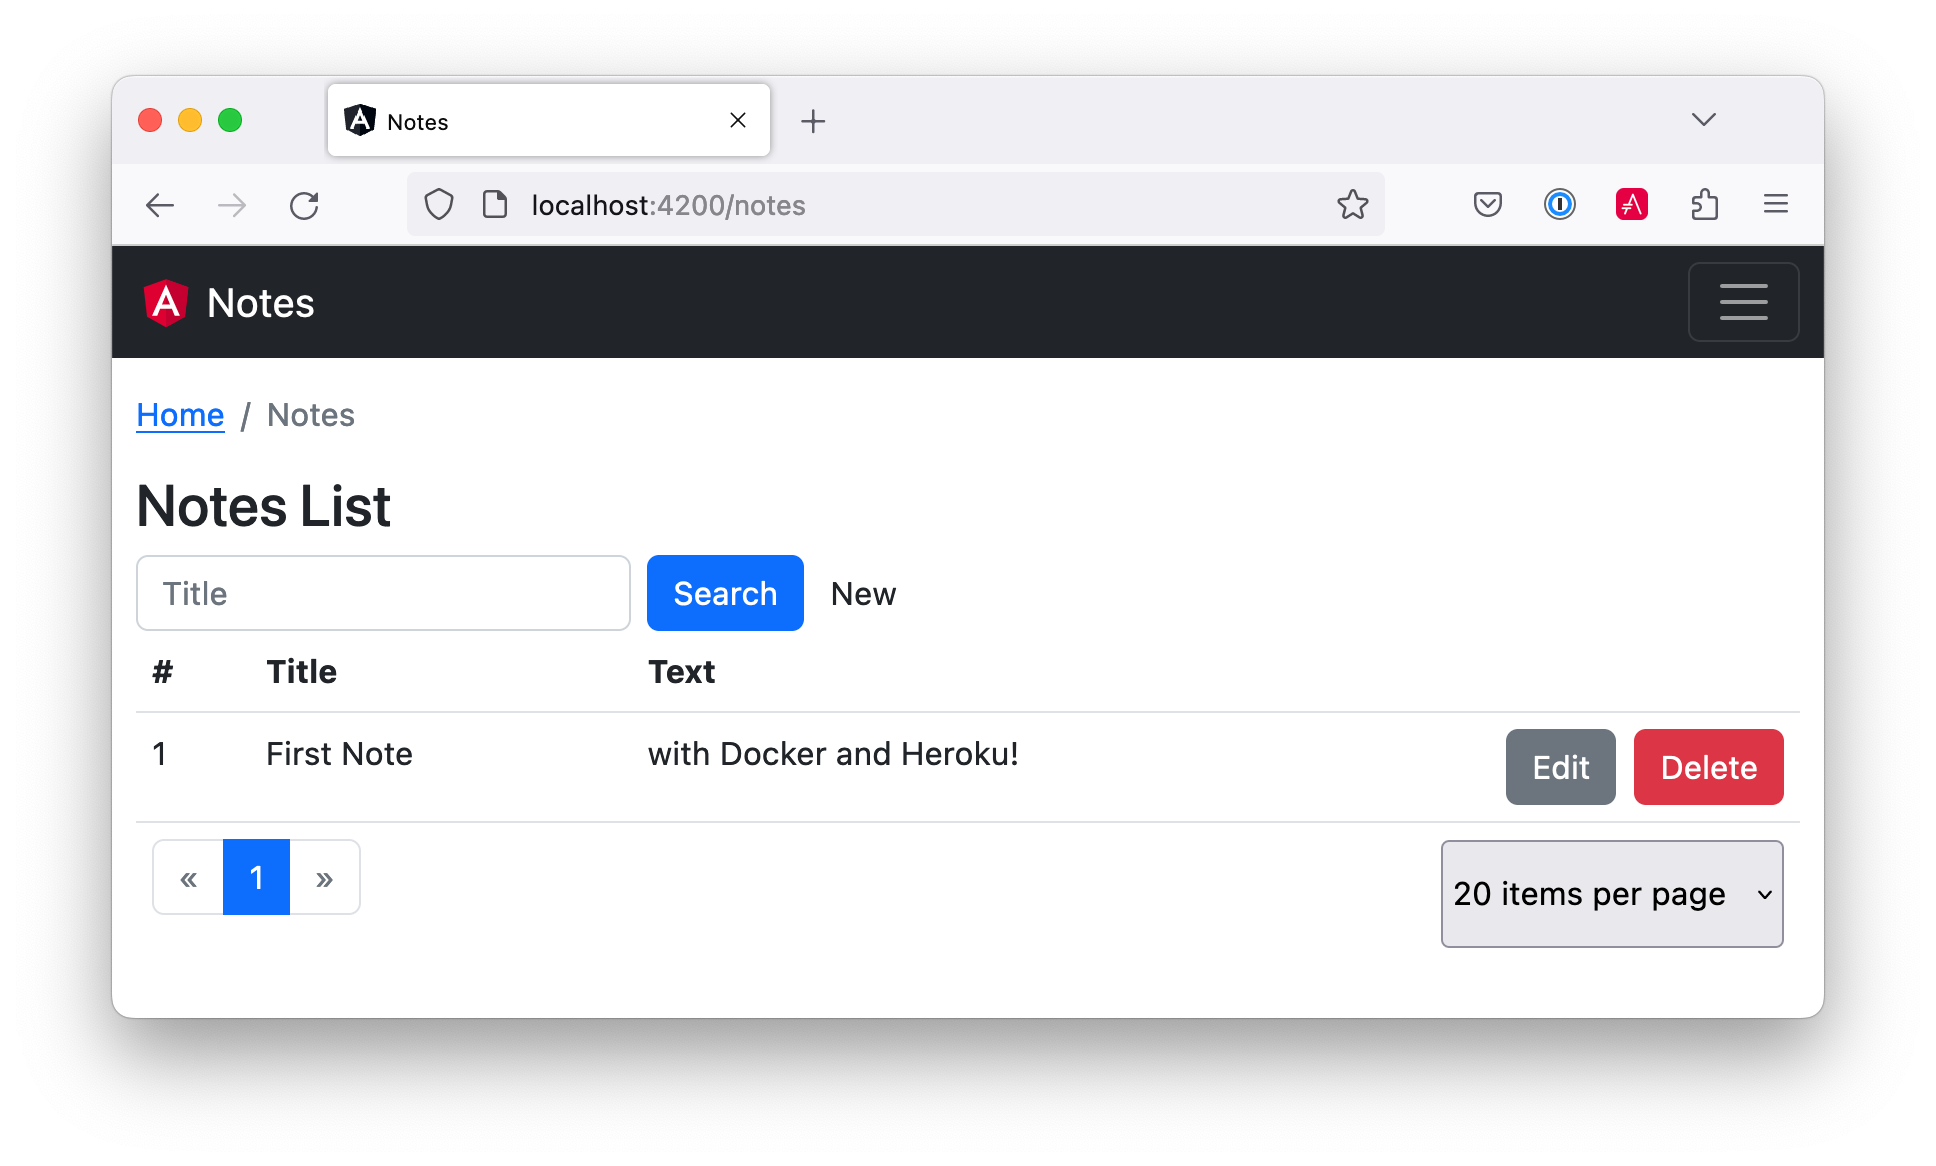
Now you should be able to rebuild and run your Angular Docker container.
npm run docker
npm run ng-notes
Open your browser to http://localhost:4200, log in, and confirm you can add notes.
Verify the data made it to Heroku by going to https://<your-heroku-app>.herokuapp.com/api/notes.
Deploy Angular + Docker to Heroku
Heroku has several slick features regarding Docker images. If your project has a Dockerfile, you can deploy your app directly using the Heroku Container Registry.
First, ensure you’re in the notes directory, then log in to the Container Registry.
heroku container:loginThen, create a new app.
heroku createAdd the angular-docker project to Git and commit it from the root directory.
git init
git add .
git commit -m "Initial commit"
Add the Git URL as a new remote named docker.
git remote add docker https://git.heroku.com/<your-app-name>.gitYou’ll need to update nginx.config so it reads from a $PORT environment variable if it’s set; otherwise default it to 80. You can use envsubst to do this at runtime. However, the default envsubst doesn’t allow default variables. The good news is a8m/envsubst on GitHub does!
Replace your nginx.config with the following configuration that defaults to 80 and escapes the $uri variable so it’s not replaced with a blank value.
server {
    listen       ${PORT:-80};
    server_name  _;

    root /usr/share/nginx/html;
    index index.html;

    location / {
        try_files $$uri /index.html;
    }
}
You’ll also need to update your Dockerfile so it uses the aforementioned envsubst.
FROM --platform=linux/amd64 node:18-alpine AS builder

WORKDIR /opt/web
COPY package.json package-lock.json ./
RUN npm install

ENV PATH="./node_modules/.bin:$PATH"

COPY . ./
RUN ng build

FROM --platform=linux/amd64 nginx:1-alpine
RUN apk --no-cache add curl
RUN curl -L https://github.com/a8m/envsubst/releases/download/v1.4.2/envsubst-`uname -s`-`uname -m` -o envsubst && \
    chmod +x envsubst && \
    mv envsubst /usr/local/bin
COPY ./nginx.config /etc/nginx/nginx.template
CMD ["/bin/sh", "-c", "envsubst < /etc/nginx/nginx.template > /etc/nginx/conf.d/default.conf && nginx -g 'daemon off;'"]
COPY --from=builder /opt/web/dist/notes /usr/share/nginx/html
Then, from the notes directory, push your Docker image to Heroku’s Container Registry.
heroku container:push web --remote dockerOnce the push process has completed, release the image of your app:
heroku container:release web --remote dockerAnd open the app in your browser:
heroku open --remote dockerYou’ll need to add your app’s URL to Auth0 as an allowed callback URL. Run auth0 apps open or log in to your Auth0 management dashboard and open the Angular app. Add the following URLs:
-
Callback:
https://<angular-docker-app>.herokuapp.com/home -
Logout:
https://<angular-docker-app>.herokuapp.com -
Web origin:
https://<angular-docker-app>.herokuapp.com
You’ll need to add the new app’s URL as an allowed origin in your Spring Boot app on Heroku. Run the following command to edit your Spring Boot app’s configuration.
heroku config:edit --app <your-spring-boot-app-on-heroku>Add the new URL after your existing ones, separating them with a comma. For example:
ALLOWED_ORIGINS='...,https://<angular-docker-app>.herokuapp.com'Now you should be able to log in and see the note you created earlier.
A-Rated Security Headers for Nginx in Docker
If you test your freshly-deployed Angular app with securityheaders.com, you’ll get an F. To solve this, modify your nginx.config to add security headers.
server {
listen ${PORT:-80};
server_name _;
root /usr/share/nginx/html;
index index.html;
location / {
try_files $$uri /index.html;
}
add_header Content-Security-Policy "default-src 'self'; script-src 'self' 'unsafe-inline'; style-src 'self' 'unsafe-inline'; img-src 'self' data:; font-src 'self' data:; frame-ancestors 'none'; connect-src 'self' https://*.auth0.com https://*.herokuapp.com; frame-src 'self' https://*.auth0.com";
add_header Referrer-Policy "no-referrer, strict-origin-when-cross-origin";
add_header Strict-Transport-Security "max-age=63072000; includeSubDomains";
add_header X-Content-Type-Options nosniff;
add_header X-Frame-Options DENY;
add_header X-XSS-Protection "1; mode=block";
add_header Permissions-Policy "geolocation=(self), microphone=(), accelerometer=(), camera=()";
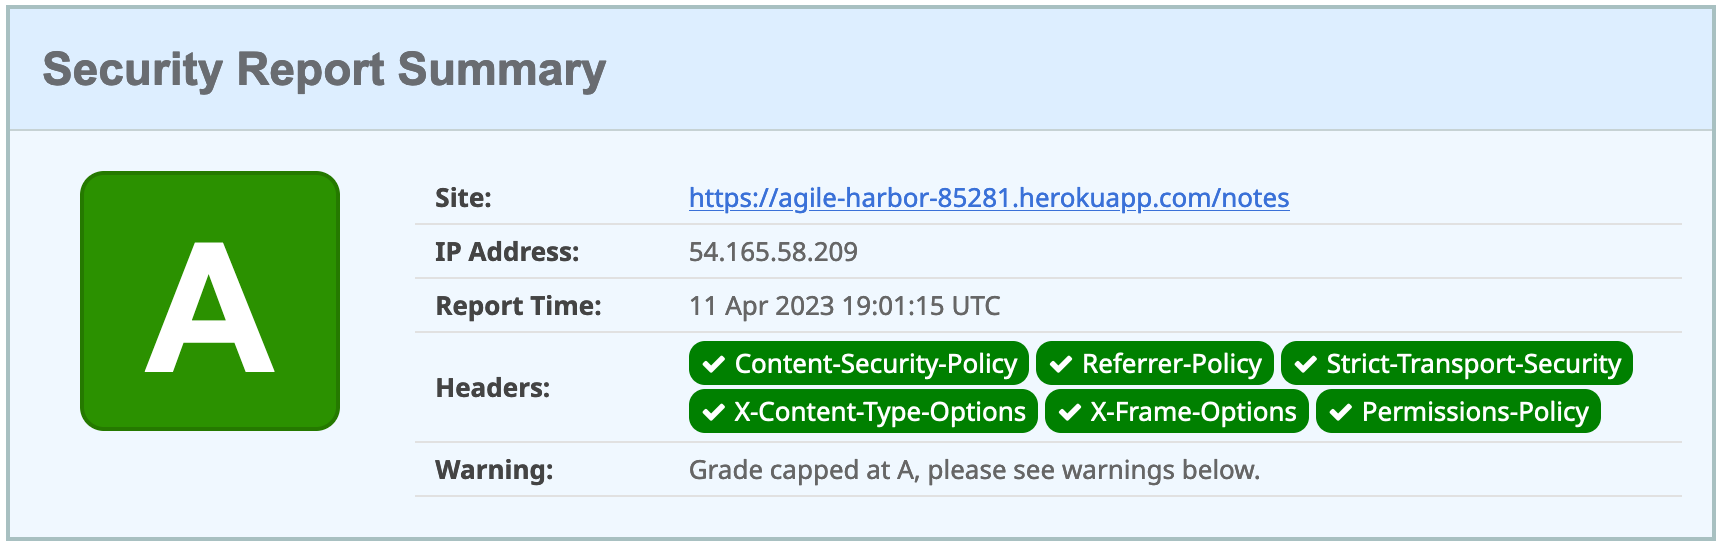
}After updating this file, run the following commands:
heroku container:push web --remote docker
heroku container:release web --remote docker
Now you should get an A!
Combine Angular and Spring Boot in a Single Artifact
In the previous sections, you learned how to deploy your Angular and Spring Boot apps separately. Now I’ll show you how to combine them into a single JAR for production. You’ll still be able to run them independently in development, but deploying them to production will be easier because you won’t have to worry about CORS (cross-origin resource sharing). I’ll also convert the OAuth flows so they all happen server-side, which is more secure as the access token won’t be stored in the browser.
Update Your Angular App’s Authentication Mechanism
Create a new AuthService service that will communicate with your Spring Boot API for authentication logic.
import { Injectable } from '@angular/core';
import { Location } from '@angular/common';
import { BehaviorSubject, lastValueFrom, Observable } from 'rxjs';
import { HttpClient, HttpHeaders } from '@angular/common/http';
import { environment } from '../../environments/environment';
import { User } from './user';
import { map } from 'rxjs/operators';

const headers = new HttpHeaders().set('Accept', 'application/json');

@Injectable({
  providedIn: 'root'
})
export class AuthService {
  $authenticationState = new BehaviorSubject<boolean>(false);

  constructor(private http: HttpClient, private location: Location) {
  }

  getUser(): Observable<User> {
    return this.http.get<User>(`${environment.apiUrl}/user`, {headers}) (1)
      .pipe(map((response: User) => {
          if (response !== null) {
            this.$authenticationState.next(true);
          }
          return response;
        })
      );
  }

  async isAuthenticated(): Promise<boolean> {
    const user = await lastValueFrom(this.getUser());
    return user !== null;
  }

  login(): void { (2)
    location.href = `${location.origin}${this.location.prepareExternalUrl('oauth2/authorization/okta')}`;
  }

  logout(): void { (3)
    this.http.post(`${environment.apiUrl}/api/logout`, {}).subscribe((response: any) => {
      location.href = response.logoutUrl;
    });
  }
}| 1 | Talk to the /user endpoint to determine authenticated status. A user object will be returned if the user is logged in. |
| 2 | When the user clicks a login button, redirect them to a Spring Security endpoint to do the OAuth dance. |
| 3 | Logout using the /api/logout endpoint, which returns the Auth0 Logout API URL with required parameters. |
Create a user.ts file in the same directory to hold your User model.
export class User {
  sub!: number;
  fullName!: string;
}
Update app.component.ts to use your new AuthService in favor of Auth0’s AuthService.
import { Component, OnInit } from '@angular/core';
import { AuthService } from './shared/auth.service';

@Component({
  selector: 'app-root',
  templateUrl: './app.component.html',
  styleUrls: ['./app.component.scss']
})
export class AppComponent implements OnInit {
  title = 'Notes';
  isAuthenticated: boolean = false;
  isCollapsed = true;

  constructor(public auth: AuthService) {
  }

  async ngOnInit() {
    this.isAuthenticated = await this.auth.isAuthenticated();
  }
}
Remove AuthModule and its related code from app.component.spec.ts and home.component.spec.ts. You must also add HttpClientTestingModule to their TestBed imports.
Change the buttons and link in app.component.html to reference the isAuthenticated property instead of auth.isAuthenticated$.
<button *ngIf="!isAuthenticated" (click)="auth.login()"
        type="button" class="btn btn-outline-primary"
        id="login">Login</button>
<button *ngIf="isAuthenticated" (click)="auth.logout()"
        type="button" class="btn btn-outline-secondary"
        id="logout">Logout</button>
...
<div class="container-fluid pt-3">
  <a *ngIf="!isAuthenticated">Please log in to manage your notes.</a>
  <router-outlet *ngIf="isAuthenticated"></router-outlet>
</div>
Update home.component.ts to use AuthService too.
import { Component, OnInit } from '@angular/core';
import { AuthService } from '../shared/auth.service';

@Component({
  selector: 'app-home',
  templateUrl: './home.component.html',
  styleUrls: ['./home.component.scss']
})
export class HomeComponent implements OnInit {
  isAuthenticated!: boolean;

  constructor(public auth: AuthService) {
  }

  async ngOnInit() {
    this.isAuthenticated = await this.auth.isAuthenticated();
  }
}
Update home.component.html so it reads the isAuthenticated property.
<p><a routerLink="/notes" *ngIf="isAuthenticated">View Notes</a></p>Delete notes/src/app/auth-routing.module.ts.
Modify app.module.ts to remove the AuthRoutingModule import, add HomeComponent as a declaration, and import HttpClientModule.
import { NgModule } from '@angular/core';
import { BrowserModule } from '@angular/platform-browser';

import { AppRoutingModule } from './app-routing.module';
import { AppComponent } from './app.component';
import { NoteModule } from './note/note.module';
import { NgbModule } from '@ng-bootstrap/ng-bootstrap';
import { HomeComponent } from './home/home.component';
import { HttpClientModule } from '@angular/common/http';

@NgModule({
  declarations: [
    AppComponent,
    HomeComponent
  ],
  imports: [
    BrowserModule,
    AppRoutingModule,
    HttpClientModule,
    NoteModule,
    NgbModule
  ],
  providers: [],
  bootstrap: [AppComponent]
})
export class AppModule { }
Update notes/src/app/note/note.routes.ts to remove the AuthGuard.
Add the route for HomeComponent to app-routing.module.ts.
import { HomeComponent } from './home/home.component';

const routes: Routes = [
  { path: '', redirectTo: '/home', pathMatch: 'full' },
  {
    path: 'home',
    component: HomeComponent
  }
];
Change both environment.development.ts and environment.ts to use a blank apiUrl.
apiUrl: ''Create a proxy.conf.js file to proxy certain requests to your Spring Boot API on http://localhost:8080.
const PROXY_CONFIG = [
  {
    context: ['/user', '/api', '/oauth2', '/login'],
    target: 'http://localhost:8080',
    secure: false,
    logLevel: 'debug'
  }
]

module.exports = PROXY_CONFIG;
Add this file as a proxyConfig option in angular.json.
"serve": {
  "builder": "@angular-devkit/build-angular:dev-server",
  "configurations": {
    "production": {
      "browserTarget": "notes:build:production"
    },
    "development": {
      "browserTarget": "notes:build:development",
      "proxyConfig": "src/proxy.conf.js"
    }
  },
},
Remove Auth0’s Angular SDK and OktaDev Schematics:
npm uninstall @auth0/auth0-angular @oktadev/schematicsAt this point, your Angular app doesn’t contain any Auth0-specific code for authentication. Instead, it relies on your Spring Boot app to provide that.
In the Spring Boot app, you must adjust how the email is retrieved from the user’s profile. The easiest way to do this is to add the following property to application-dev.properties and application-prod.properties.
spring.security.oauth2.client.provider.okta.user-name-attribute=preferred_usernameThen in DemoApplication.kt, change the AddUserToNote class to use the SecurityContextHolder to get the email.
class AddUserToNote {

    @HandleBeforeCreate
    fun handleCreate(note: Note) {
        val email = SecurityContextHolder.getContext().authentication.name
        note.username = email
        println("Creating note: $note")
    }
}
You’ll need to make the same change to the email variable in UserController.kt.
class UserController(val repository: NotesRepository) {

    @GetMapping("/user/notes")
    fun notes(principal: Principal, title: String?, pageable: Pageable): Page<Note> {
        val email = principal.name
        ...
    }

    ...
}
To log in from your Angular app, you’ll need to modify the Spring Boot app on Auth0 to allow callback and logout URLs from the Angular app. Run auth0 apps open, select your Spring Boot app, and it’ll open in the Auth0 dashboard. Then, add the following URLs:
-
Logout:
http://localhost:4200
Now you can run ng serve in your Angular app and source .okta.env && ./gradlew bootRun in your Spring Boot app and log in as you did before. You will not be able to log out since you haven’t added the /api/logout endpoint to do so. You also won’t be able to add notes because (cross-site request forgery) CSRF needs to be configured. You’ll do that in the next section.
Configure Spring Boot for CSRF
To add notes, you’ll need to configure Spring Boot to use CSRF. CSRF is a security measure that prevents cross-site request forgery. It works by requiring a token to be sent with every request. This token is stored in a cookie and is sent back to the server with every request. The server then checks that the token matches the one in the cookie. If it doesn’t, the request is rejected.
To configure Spring Boot for CSRF, modify your SecurityConfiguration.kt file to add CSRF support.
...
import org.springframework.security.web.authentication.www.BasicAuthenticationFilter
import org.springframework.security.web.csrf.CookieCsrfTokenRepository
import org.springframework.security.web.csrf.CsrfTokenRequestAttributeHandler

@Configuration
class SecurityConfiguration {

    @Bean
    fun webSecurity(http: HttpSecurity): SecurityFilterChain {
        ...

        http.csrf()
            .csrfTokenRepository(CookieCsrfTokenRepository.withHttpOnlyFalse())
            .csrfTokenRequestHandler(CsrfTokenRequestAttributeHandler())

        http.addFilterAfter(CookieCsrfFilter(), BasicAuthenticationFilter::class.java)

        ...
    }
}
Create a CookieCsrfFilter.kt file in the same package to add the CSRF token to the response.
package com.okta.developer.notes

import jakarta.servlet.FilterChain
import jakarta.servlet.ServletException
import jakarta.servlet.http.HttpServletRequest
import jakarta.servlet.http.HttpServletResponse
import org.springframework.security.web.csrf.CsrfToken
import org.springframework.web.filter.OncePerRequestFilter
import java.io.IOException

/**
 * Spring Security 6 doesn't set a XSRF-TOKEN cookie by default.
 * This solution is <a href="https://bit.ly/3MDwjnj">recommended</a> by Spring Security.
 */
class CookieCsrfFilter : OncePerRequestFilter() {
    /** {@inheritDoc}  */
    @Throws(ServletException::class, IOException::class)
    override fun doFilterInternal(
        request: HttpServletRequest,
        response: HttpServletResponse,
        filterChain: FilterChain
    ) {
        val csrfToken = request.getAttribute(CsrfToken::class.java.name) as CsrfToken
        response.setHeader(csrfToken.headerName, csrfToken.token)
        filterChain.doFilter(request, response)
    }
}
Angular’s HttpClient supports the client-side half of the CSRF protection. It’ll read the cookie sent by Spring Boot and return it in an X-XSRF-TOKEN header. You can read more about this at Angular’s Security docs.
Now you’ll need to adjust your Spring Boot app to include Angular for production.
Configure Spring Boot to Include Your Angular SPA
In your Spring Boot app, you’ll need to change several things. You must configure Gradle to build your Angular app when you pass in -Pprod, you must adjust its routes (so it’s SPA-aware and routes all 404s to index.html), and you must modify Spring Security to allow HTML, CSS, and JavaScript to be anonymously accessed.
To begin, delete src/main/kotlin/…/notes/HomeController.kt. You’ll no longer need this because your Angular app will be served up at the / path.
Next, create a SpaWebFilter.kt that routes all requests to index.html.
package com.okta.developer.notes

import jakarta.servlet.FilterChain
import jakarta.servlet.ServletException
import jakarta.servlet.http.HttpServletRequest
import jakarta.servlet.http.HttpServletResponse
import org.springframework.web.filter.OncePerRequestFilter
import java.io.IOException

class SpaWebFilter : OncePerRequestFilter() {

    /**
     * Forwards any unmapped paths (except those containing a period) to `index.html`.
     */
    @Throws(ServletException::class, IOException::class)
    override fun doFilterInternal(
        request: HttpServletRequest,
        response: HttpServletResponse,
        filterChain: FilterChain
    ) {
        val path = request.requestURI
        if (!path.startsWith("/api") &&
            !path.startsWith("/login") &&
            !path.startsWith("/oauth2") &&
            !path.startsWith("/user") &&
            !path.contains(".") &&
            path.matches("/(.*)".toRegex())
        ) {
            request.getRequestDispatcher("/index.html").forward(request, response)
            return
        }
        filterChain.doFilter(request, response)
    }
}
Modify SecurityConfiguration.kt to allow anonymous access to static web files, the /user info endpoint, add the SpaWebFilter, and add additional security headers.
package com.okta.developer.notes

import org.springframework.beans.factory.annotation.Value
import org.springframework.context.annotation.Bean
import org.springframework.context.annotation.Configuration
import org.springframework.security.config.Customizer.withDefaults
import org.springframework.security.config.annotation.web.builders.HttpSecurity
import org.springframework.security.oauth2.core.DelegatingOAuth2TokenValidator
import org.springframework.security.oauth2.core.OAuth2Error
import org.springframework.security.oauth2.core.OAuth2TokenValidator
import org.springframework.security.oauth2.core.OAuth2TokenValidatorResult
import org.springframework.security.oauth2.jwt.*
import org.springframework.security.web.SecurityFilterChain
import org.springframework.security.web.authentication.www.BasicAuthenticationFilter
import org.springframework.security.web.csrf.CookieCsrfTokenRepository
import org.springframework.security.web.csrf.CsrfTokenRequestAttributeHandler
import org.springframework.security.web.header.writers.ReferrerPolicyHeaderWriter
import org.springframework.security.web.util.matcher.RequestMatcher
import org.springframework.web.cors.CorsConfiguration
import org.springframework.web.cors.CorsConfigurationSource
import org.springframework.web.cors.UrlBasedCorsConfigurationSource

@Configuration
class SecurityConfiguration {

    @Bean
    fun webSecurity(http: HttpSecurity): SecurityFilterChain {
        http
            .authorizeHttpRequests { authz ->
                authz.requestMatchers("/", "/index.html", "/*.js", "/*.css", "/assets/**").permitAll()
                authz.requestMatchers("/user").permitAll()
                authz.anyRequest().authenticated()
            }
            .oauth2Login(withDefaults())
            .oauth2ResourceServer().jwt()

        http.cors()

        http.requiresChannel().requestMatchers(RequestMatcher { r ->
            r.getHeader("X-Forwarded-Proto") != null
        }).requiresSecure()

        http.csrf()
            .csrfTokenRepository(CookieCsrfTokenRepository.withHttpOnlyFalse())
            .csrfTokenRequestHandler(CsrfTokenRequestAttributeHandler())

        http.addFilterAfter(SpaWebFilter(), BasicAuthenticationFilter::class.java)
        http.addFilterAfter(CookieCsrfFilter(), BasicAuthenticationFilter::class.java)

        http.headers { headers ->
            headers.contentSecurityPolicy("script-src 'self' 'unsafe-inline'; report-to /csp-report-endpoint/")
            headers.frameOptions { frameOptions -> frameOptions.sameOrigin() }
            headers.referrerPolicy { referrer ->
                referrer.policy(ReferrerPolicyHeaderWriter.ReferrerPolicy.STRICT_ORIGIN_WHEN_CROSS_ORIGIN)
            }
            headers.permissionsPolicy { permissions ->
                permissions.policy("camera=(), fullscreen=(self), geolocation=(), gyroscope=(), " +
                        "magnetometer=(), microphone=(), midi=(), payment=(), sync-xhr=()")
            }
        }

        return http.build()
    }

    ...
}| See Spring Security’s headers documentation for default security headers and other options. |
With Kotlin, you can mark parameters and return values as optional by adding ? to their type. Update the user() method in UserController.kt to make OidcUser optional. It will be null when the user is not authenticated; that’s why this change is needed.
@GetMapping("/user")
fun user(@AuthenticationPrincipal user: OidcUser?): OidcUser? {
    return user
}
Previously, Angular handled logout. Add a LogoutController that will handle expiring the session as well as sending a logout URL back to Angular so it can sign out from Auth0.
package com.okta.developer.notes

import jakarta.servlet.http.HttpServletRequest
import org.springframework.http.HttpHeaders
import org.springframework.http.ResponseEntity
import org.springframework.security.oauth2.client.registration.ClientRegistration
import org.springframework.security.oauth2.client.registration.ClientRegistrationRepository
import org.springframework.web.bind.annotation.PostMapping
import org.springframework.web.bind.annotation.RestController

@RestController
class LogoutController(clientRegistrationRepository: ClientRegistrationRepository) {

    val registration: ClientRegistration =
        clientRegistrationRepository.findByRegistrationId("okta")

    @PostMapping("/api/logout")
    fun logout(request: HttpServletRequest): ResponseEntity<*> {
        val issuerUri = registration.providerDetails.issuerUri
        val originUrl = request.getHeader(HttpHeaders.ORIGIN)
        val logoutUrl =
            "${issuerUri}v2/logout?client_id=${registration.clientId}&returnTo=${originUrl}"
        request.session.invalidate()
        return ResponseEntity.ok().body(java.util.Map.of("logoutUrl", logoutUrl))
    }
}
You can also remove the allowed.origins property from the application-dev.properties and application-prod.properties files since Angular will proxy the request in development (eliminating the need for CORS), and there won’t be cross-domain requests in production.
Add a server.port property to application-prod.properties that uses a PORT environment variable if it’s set.
server.port=${PORT:8080}Because there won’t be any cross-domain requests, you can also remove the corsConfigurationSource bean, the allowedOrigins variable, and associated imports in SecurityConfiguration.kt.
Modify Gradle to Build a JAR with Angular Included
Now that your Spring Boot app is ready to serve up your Angular app, you need to modify your Gradle configuration to build your Angular app and package it in the JAR.
Start by importing NpxTask and adding the Node Gradle plugin.
import com.github.gradle.node.npm.task.NpxTask

plugins {
    ...
    id("com.github.node-gradle.node") version "3.5.1"
    ...
}
Then, define the location of your Angular app and configuration for the Node plugin. I added this at the bottom of the file.
val spa = "${projectDir}/../notes"

node {
    version.set("18")
    nodeProjectDir.set(file(spa))
}
Add a buildWeb task:
val buildWeb = tasks.register<NpxTask>("buildNpm") {
    dependsOn(tasks.npmInstall)
    command.set("ng")
    args.set(listOf("build"))
    inputs.dir("${spa}/src")
    inputs.dir(fileTree("${spa}/node_modules").exclude("${spa}/.cache"))
    outputs.dir("${spa}/dist")
}
And modify the processResources task to build Angular when -Pprod is passed in.
tasks.processResources {
    rename("application-${profile}.properties", "application.properties")
    if (profile == "prod") {
        dependsOn(buildWeb)
        from("${spa}/dist/notes") {
            into("static")
        }
    }
}
Now you should be able to combine both apps when running ./gradlew bootJar -Pprod in the notes-api directory. Once it’s built, run it with the following commands and ensure everything works. You should be able to log in, create notes, and log out.
docker-compose -f src/main/docker/postgresql.yml up -d
source .okta.env
java -jar build/libs/*.jar
Congrats! You modified your Angular and Spring Boot apps to be packaged together and implemented the most secure form of OAuth 2.0 to boot! 🥳
Build a Docker Image with Jib
Since everything is done via Gradle now, you can use plugins to build a Docker container. Jib builds optimized Docker images without the need for deep mastery of Docker best practices. It reads your Gradle/Maven build files for its metadata.
To add Jib support, add its Gradle plugin.
plugins {
    ...
    id("com.google.cloud.tools.jib") version "3.3.1"
}
Then, at the end of this file, add jib configuration to specify your image name and the active Spring profile.
jib {
    from {
        platforms {
            platform {
                architecture = (project.properties["jibArchitecture"] ?: "amd64").toString()
                os = "linux"
            }
        }
    }
    to {
        image = "<your-username>/bootiful-angular"
    }
    container {
        environment = mapOf("SPRING_PROFILES_ACTIVE" to profile)
    }
}
Run the following command to build a Docker image with Jib.
./gradlew jibDockerBuild -Pprod
If you’re building on a Mac with Apple Silicon, you’ll need to specify the architecture. For example, ./gradlew jibDockerBuild -Pprod -PjibArchitecture=arm64.
|
If you want to override the image name in build.gradle.kts, you can pass in an --image parameter. For example, ./gradlew jibDockerBuild -Pprod --image=bootiful-ng.
|
Run Your Spring Boot Docker App with Docker Compose
In theory, you should be able to run the following command to run your app.
docker run --publish=8080:8080 <your-username>/bootiful-angularHowever, Spring Boot won’t start because you haven’t configured the Okta environment variables. You could pass them in on the command line, but specifying them in a file is easier.
You can use Docker Compose and its env_file option to specify environment variables.
Copy notes-api/.okta.env to src/main/docker/.env.
cp .okta.env src/main/docker/.envRemove export at the beginning of each line. It should resemble something like the following after this change:
export OKTA_OAUTH2_ISSUER=https://dev-1337.us.auth0.com/
export OKTA_OAUTH2_CLIENT_ID=eEhk09l...
export OKTA_OAUTH2_CLIENT_SECRET=YIEnmp8c...
export OKTA_OAUTH2_AUDIENCE=https://dev-1337.us.auth0.com/api/v2/
Create a src/main/docker/app.yml file that configures your app to set environment variables and leverages your existing PostgreSQL container. Make sure to replace the <your-username> placeholder and make the image match what’s in your build.gradle.kts file.
version: '3.8'
services:
  boot-app:
    image: <your-username>/bootiful-angular
    environment:
      - SPRING_DATASOURCE_URL=jdbc:postgresql://notes-postgresql:5432/notes
      - OKTA_OAUTH2_ISSUER=${OKTA_OAUTH2_ISSUER}
      - OKTA_OAUTH2_CLIENT_ID=${OKTA_OAUTH2_CLIENT_ID}
      - OKTA_OAUTH2_CLIENT_SECRET=${OKTA_OAUTH2_CLIENT_SECRET}
      - OKTA_OAUTH2_AUDIENCE=${OKTA_OAUTH2_AUDIENCE}
    ports:
      - 8080:8080
    depends_on:
      - notes-postgresql
  notes-postgresql:
    extends:
      file: postgresql.yml
      service: notes-postgresql
Docker Compose expects the .env file to be in the directory you run docker-compose from, so you have two choices:
-
Navigate to the
src/main/dockerdirectory before runningdocker-compose -
Create a symlink to
.envin your root directory:ln -s src/main/docker/.env
If you choose option #1, run:
cd src/main/docker
docker-compose -f app.yml up
Option #2 looks like this:
docker-compose -f src/main/docker/app.yml upDeploy Your Spring Boot + Angular Container to Docker Hub
Jib makes it incredibly easy to deploy your container to Docker Hub. If you don’t already have a Docker Hub account, you can create one.
Run docker login to log into your account, then use the jib task to build and deploy your image.
./gradlew jib -PprodIsn’t it cool how Jib makes it so you don’t need a Dockerfile?
Run via Docker on Heroku and Knative
To deploy this container to Heroku, create a new Heroku app and add it as a Git remote.
heroku create
git remote add jib https://git.heroku.com/<your-new-app>.git
At this point, you can use the PostgreSQL add-on you already configured. If you’d like to do this, use addons:attach instead of addons:create in the following command. Since the PostgreSQL add-on is free, I will just show how to create a new one.
Add PostgreSQL to this app and configure it for Spring Boot using the following commands:
heroku addons:create heroku-postgresql --remote jib
heroku config:get DATABASE_URL --remote jib
heroku config:set SPRING_DATASOURCE_URL=jdbc:postgresql://<value-after-@-from-last-command> --remote jib
heroku config:set SPRING_DATASOURCE_USERNAME=<username-value-from-last-command> --remote jib
heroku config:set SPRING_DATASOURCE_PASSWORD=<password-value-from-last-command> --remote jib
heroku config:set SPRING_DATASOURCE_DRIVER_CLASS_NAME=org.postgresql.Driver --remote jib
This fine-grained configuration is unnecessary when using Heroku’s buildpacks to deploy your Spring Boot app. It injects scripts that set SPRING_* environment variables for you. In this case, Heroku doesn’t know you’re using Spring Boot since it’s running in a container.
|
Add environment variables for Auth0 to your app.
source .okta.env
heroku config:set --remote jib \
  OKTA_OAUTH2_ISSUER=$OKTA_OAUTH2_ISSUER \
  OKTA_OAUTH2_CLIENT_ID=$OKTA_OAUTH2_CLIENT_ID \
  OKTA_OAUTH2_CLIENT_SECRET=$OKTA_OAUTH2_CLIENT_SECRET \
  OKTA_OAUTH2_AUDIENCE=$OKTA_OAUTH2_AUDIENCE
To see your database and Auth0 environment variables, run the following:
heroku config --remote jibRun the commands below to deploy the image you deployed to Docker Hub. Replace the <…> placeholders with your username and app name.
docker tag <your-username>/bootiful-angular registry.heroku.com/<heroku-app>/web
docker push registry.heroku.com/<heroku-app>/web
heroku container:release web --remote jib
For example, I used:
docker tag mraible/bootiful-angular registry.heroku.com/damp-thicket-56433/web
docker push registry.heroku.com/damp-thicket-56433/web
heroku container:release web --remote jib
You can watch the logs to see if your container started successfully.
heroku logs --tail --remote jibOnce you’ve verified it has started OK, set the Hibernate configuration to only validate the schema.
heroku config:set SPRING_JPA_HIBERNATE_DDL_AUTO=validate --remote jibYou’ll need to add this app’s URL to Auth0 as an allowed callback URL. Run auth0 apps open or log in to your Auth0 management dashboard and open the Spring Boot app. Add the following URLs:
-
Callback:
https://<heroku-app>.herokuapp.com/login/oauth2/code/okta -
Logout:
https://<heroku-app>.herokuapp.com
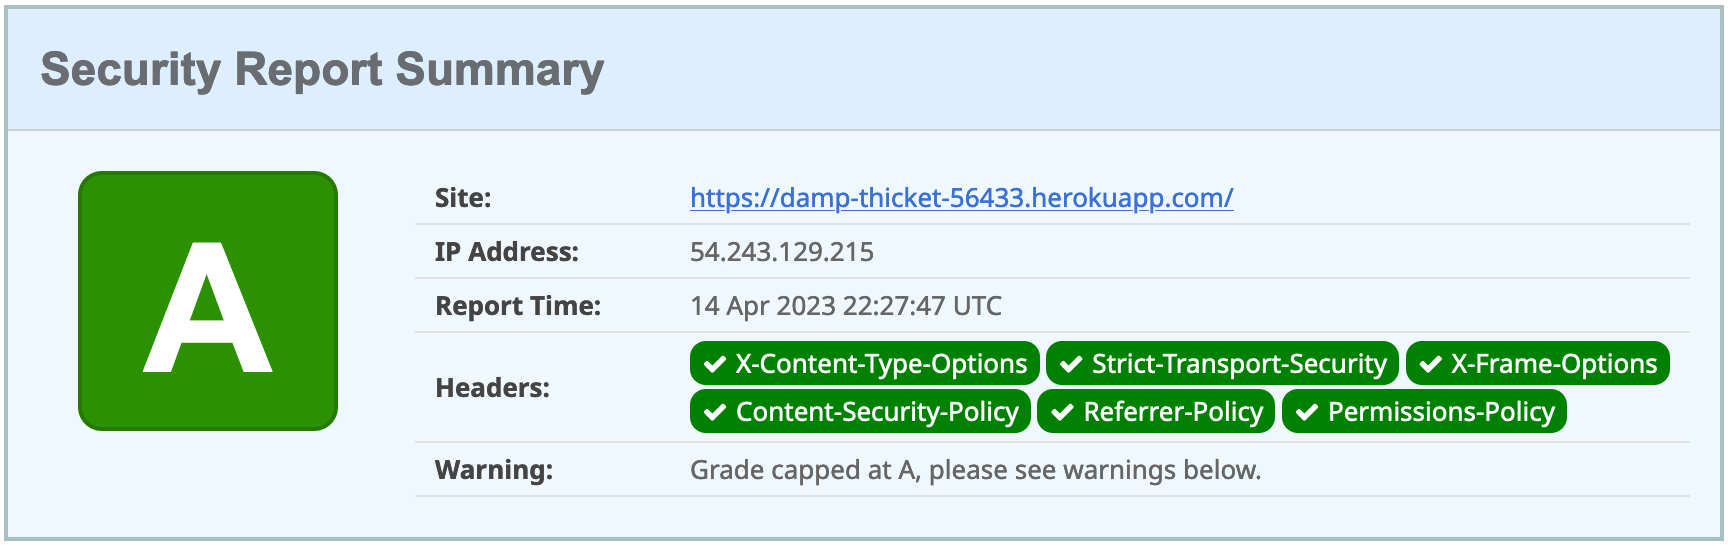
Now, you should be able to open your app, click the Login button, and authenticate!
heroku open --remote jibIf you test your Dockerfied Angular + Spring Boot app on securityheaders.com, you’ll see it scores an A!
Knative with Spring Boot + Docker
Heroku is awesome, but sometimes people want more control over their infrastructure. Enter Knative. It’s like Heroku in that it’s a Platform as a Service (PaaS). Knative is built on top of Kubernetes, so you can install several services with a bit of YAML and kubectl commands.
With Heroku, when companies reach the platform’s limitations, they have to go elsewhere to host their services. With Knative, you can just drop down to Kubernetes. It’s Heroku for Kubernetes in a sense, but you don’t have to switch to a different universe when you need additional functionality.
| Using Knative for a monolith is a bit excessive. However, I decided to include it anyway because it wasn’t easy to figure out how to configure HTTPS, PostgreSQL, and Auth0. You can skip to the Cloud Native Buildpacks section if you like. |
You’ll need a Google Cloud account for this section. Go to cloud.google.com and click Get started for free.
Once you have an account, go to Google Cloud Console and create a new project.
Then, click on the Terminal icon in the top right to open a Cloud Shell terminal for your project.
Enable Cloud and Container APIs:
gcloud services enable \
  cloudapis.googleapis.com \
  container.googleapis.com \
  containerregistry.googleapis.com
When prompted, authorize Cloud Shell to make a GCP API call.
| This command can take a minute or two to complete. |
Then, create a Kubernetes cluster called knative:
gcloud container clusters create knative \
  --zone=us-central1-c \
  --num-nodes=5 \
  --machine-type=n1-standard-4 \
  --enable-ip-alias \
  --scopes cloud-platform
You can safely ignore the warnings that result from running this command.
Next, set up a cluster administrator.
kubectl create clusterrolebinding cluster-admin-binding \
  --clusterrole=cluster-admin \
  --user=$(gcloud config get-value core/account)
Now, you should be able to install Knative!
kubectl apply -f \
 https://github.com/knative/serving/releases/download/knative-v1.9.3/serving-crds.yaml

kubectl apply -f \
 https://github.com/knative/serving/releases/download/knative-v1.9.3/serving-core.yaml
Then, install Istio:
kubectl apply -l knative.dev/crd-install=true -f \
 https://github.com/knative/net-istio/releases/download/knative-v1.9.2/istio.yaml
kubectl apply -f \
 https://github.com/knative/net-istio/releases/download/knative-v1.9.2/istio.yaml

while [[ $(kubectl get crd gateways.networking.istio.io -o jsonpath='{.status.conditions[?(@.type=="Established")].status}') != 'True' ]]; do
  echo "Waiting on Istio CRDs"; sleep 1
done

kubectl apply -f \
 https://github.com/knative/net-istio/releases/download/knative-v1.9.2/net-istio.yaml
You’ll need a domain to enable HTTPS, so set up a default domain name.
kubectl apply -f \
 https://github.com/knative/serving/releases/download/knative-v1.9.3/serving-default-domain.yaml
Install cert-manager to automatically provision and manage TLS certificates in Kubernetes.
kubectl apply -f \
 https://github.com/jetstack/cert-manager/releases/download/v1.11.1/cert-manager.yaml

kubectl wait --for=condition=Available -n cert-manager deployments/cert-manager-webhook
Connect Knative with cert-manager:
kubectl apply -f \
 https://github.com/knative/net-certmanager/releases/download/knative-v1.9.3/release.yaml
And configure free TLS certificate issuing with Let’s Encrypt.
kubectl apply -f - <<EOF
apiVersion: cert-manager.io/v1
kind: ClusterIssuer
metadata:
  name: letsencrypt-http01-issuer
spec:
  acme:
    privateKeySecretRef:
      name: letsencrypt
    server: https://acme-v02.api.letsencrypt.org/directory
    solvers:
    - http01:
       ingress:
         class: istio
EOF

kubectl wait --for=condition=Ready clusterissuer/letsencrypt-http01-issuer

kubectl apply -f - <<EOF
apiVersion: v1
kind: ConfigMap
metadata:
  name: config-certmanager
  namespace: knative-serving
  labels:
    networking.knative.dev/certificate-provider: cert-manager
data:
  issuerRef: |
    kind: ClusterIssuer
    name: letsencrypt-http01-issuer
EOF

kubectl apply -f - <<EOF
apiVersion: v1
kind: ConfigMap
metadata:
  name: config-network
  namespace: knative-serving
data:
  auto-tls: Enabled
EOF
Phew! That was a lot of kubectl and YAML, don’t you think?! The good news is you’re ready to deploy PostgreSQL and your Spring Boot app.
First, you must set environment variables to match your Docker and Auth0 settings.
# generate a random password for PostgreSQL
DB_PASSWORD=$(head -c 16 /dev/urandom | base64 -w0)
DOCKER_USERNAME=<your-dockerhub-username>
OKTA_ISSUER=<your-auth0-issuer>
OKTA_CLIENT_ID=<your-auth0-client-id>
OKTA_CLIENT_SECRET=<your-auth0-client-secret>
OKTA_AUDIENCE=<your-auth0-audience>
Then, run:
kubectl apply -f - <<EOF
apiVersion: v1
kind: PersistentVolumeClaim
metadata:
  name: pgdata
  annotations:
    volume.alpha.kubernetes.io/storage-class: default
spec:
  accessModes: [ReadWriteOnce]
  resources:
    requests:
      storage: 1Gi
---
apiVersion: apps/v1
kind: Deployment
metadata:
  name: postgres
spec:
  replicas: 1
  selector:
    matchLabels:
      service: postgres
  template:
    metadata:
      labels:
        service: postgres
    spec:
      containers:
        - name: postgres
          image: postgres:15.2
          ports:
            - containerPort: 5432
          env:
            - name: POSTGRES_DB
              value: bootiful-angular
            - name: POSTGRES_USER
              value: bootiful-angular
            - name: POSTGRES_PASSWORD
              value: $DB_PASSWORD
          volumeMounts:
            - mountPath: /var/lib/postgresql/data
              name: pgdata
              subPath: data
      volumes:
        - name: pgdata
          persistentVolumeClaim:
            claimName: pgdata
---
apiVersion: v1
kind: Service
metadata:
  name: pgservice
spec:
  ports:
  - port: 5432
    name: pgservice
  clusterIP: None
  selector:
    service: postgres
---
apiVersion: serving.knative.dev/v1
kind: Service
metadata:
  name: bootiful-angular
spec:
  template:
    spec:
      containers:
        - image: $DOCKER_USERNAME/bootiful-angular
          env:
            - name: SPRING_DATASOURCE_URL
              value: jdbc:postgresql://pgservice:5432/bootiful-angular
            - name: SPRING_DATASOURCE_USERNAME
              value: bootiful-angular
            - name: SPRING_DATASOURCE_PASSWORD
              value: $DB_PASSWORD
            - name: OKTA_OAUTH2_ISSUER
              value: $OKTA_ISSUER
            - name: OKTA_OAUTH2_CLIENT_ID
              value: $OKTA_CLIENT_ID
            - name: OKTA_OAUTH2_CLIENT_SECRET
              value: $OKTA_CLIENT_SECRET
            - name: OKTA_OAUTH2_AUDIENCE
              value: $OKTA_AUDIENCE
EOF
Once the deployment is ready (use kubectl get deployments to find out), run the command below to change it so Hibernate doesn’t try to recreate your schema on restart.
kubectl apply -f - <<EOF
apiVersion: serving.knative.dev/v1
kind: Service
metadata:
name: bootiful-angular
spec:
template:
spec:
containers:
- image: $DOCKER_USERNAME/bootiful-angular
env:
- name: SPRING_DATASOURCE_URL
value: jdbc:postgresql://pgservice:5432/bootiful-angular
- name: SPRING_DATASOURCE_USERNAME
value: bootiful-angular
- name: SPRING_DATASOURCE_PASSWORD
value: $DB_PASSWORD
- name: OKTA_OAUTH2_ISSUER
value: $OKTA_ISSUER
- name: OKTA_OAUTH2_CLIENT_ID
value: $OKTA_CLIENT_ID
- name: OKTA_OAUTH2_CLIENT_SECRET
value: $OKTA_CLIENT_SECRET
- name: OKTA_OAUTH2_AUDIENCE
value: $OKTA_AUDIENCE
- name: SPRING_JPA_HIBERNATE_DDL_AUTO
value: validate
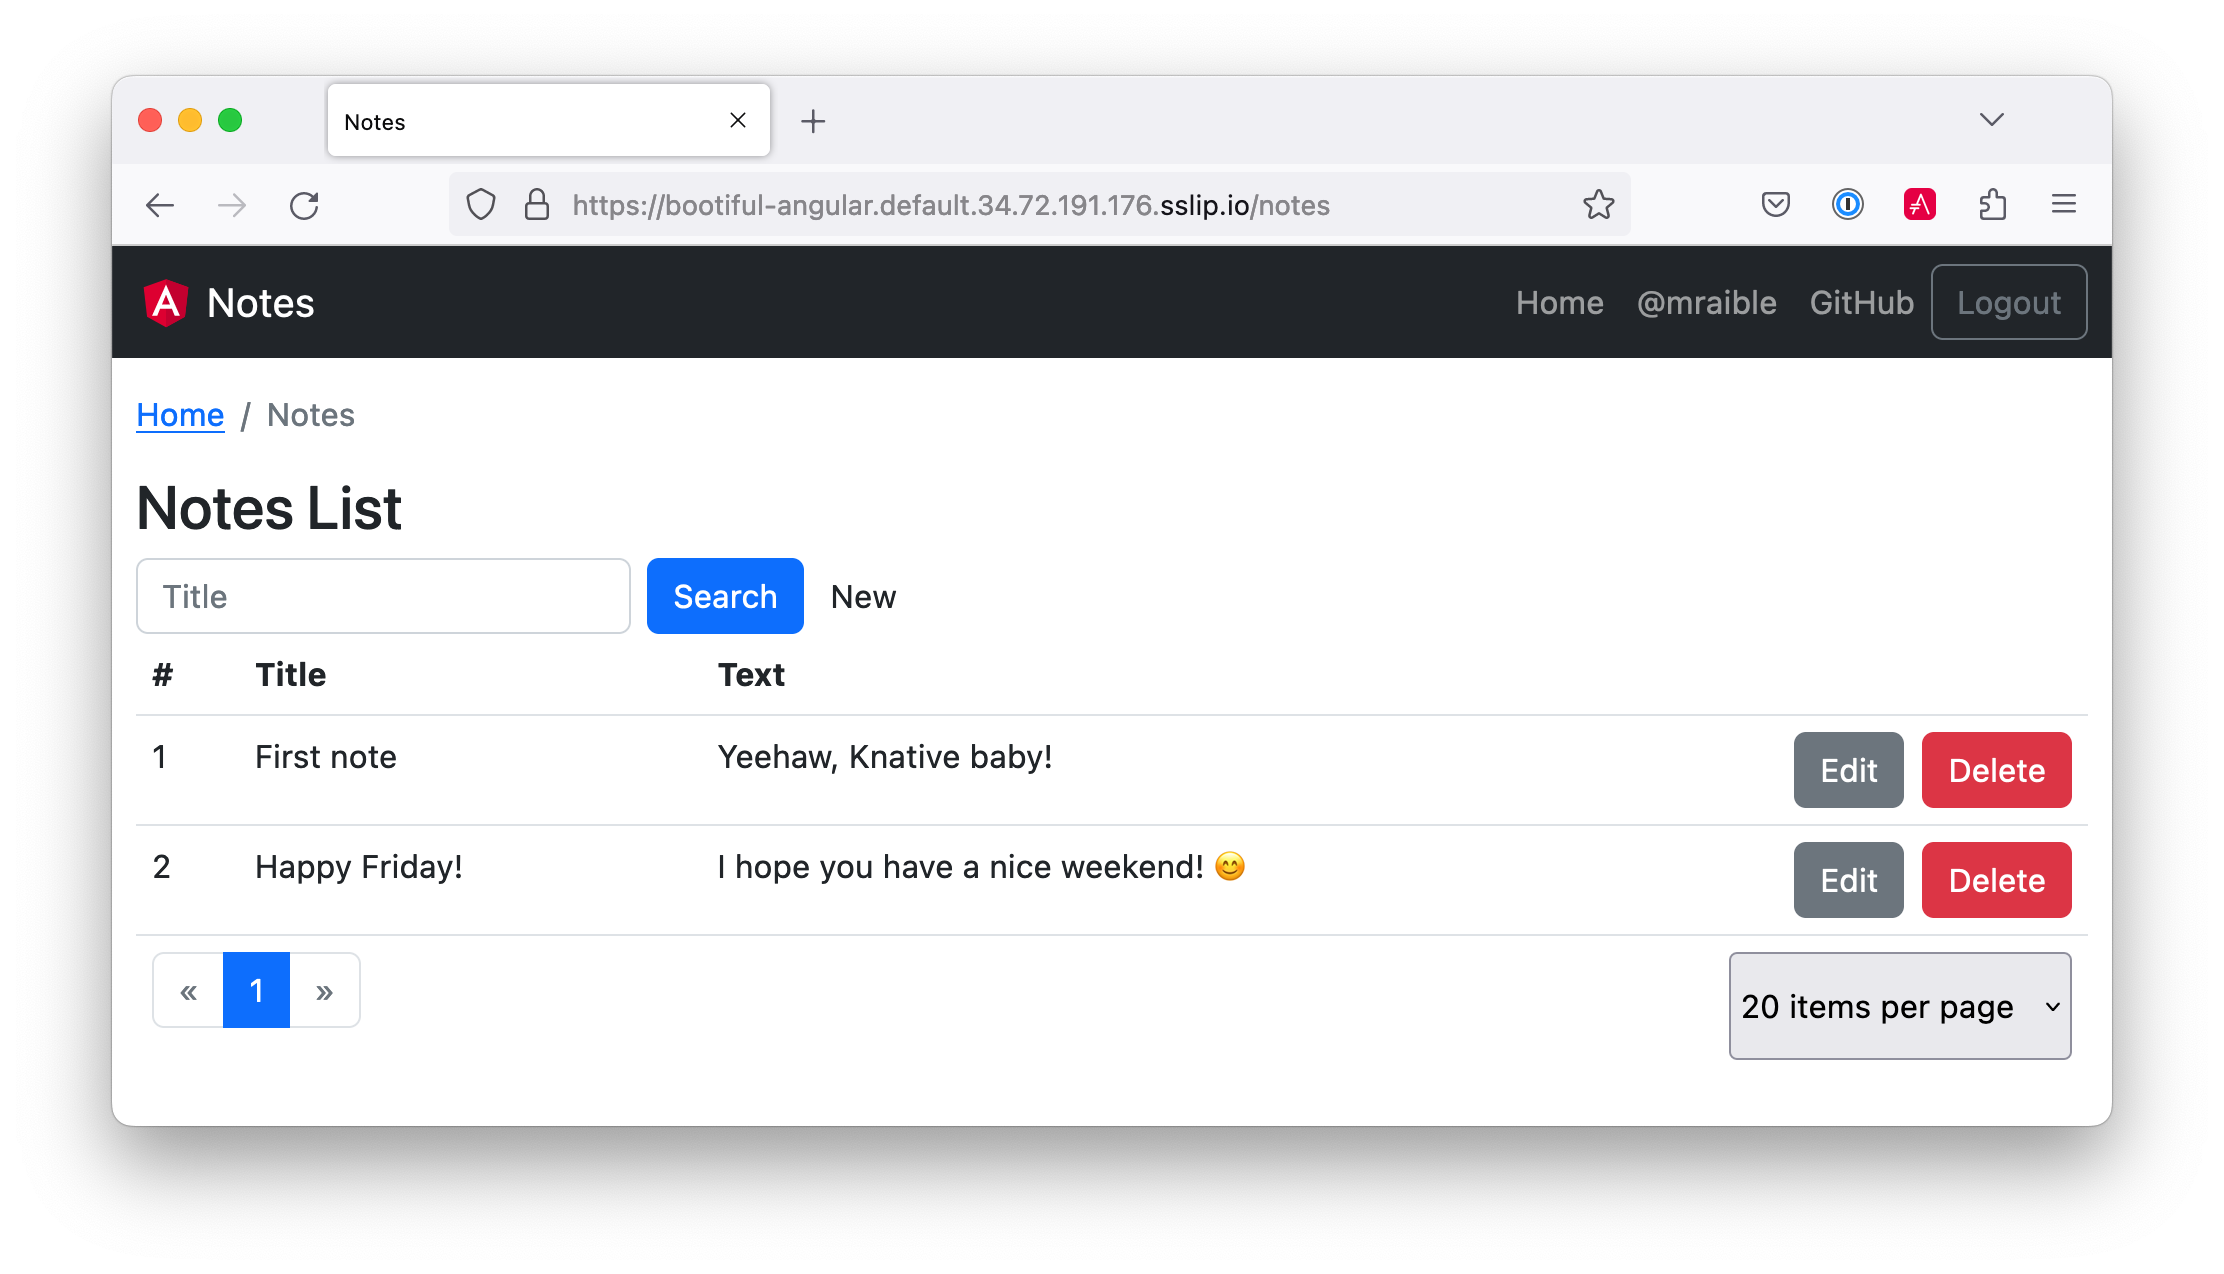
EOFIf everything works correctly, you should be able to run the following command to get the URL of your app.
kubectl get ksvcThe result should look similar to this:
NAME               URL
bootiful-angular   https://bootiful-angular.default.34.72.191.176.sslip.io
You’ll need to add this URL as an Allowed Callback URL and an Allowed Logout URL to your Spring Boot app in the Auth0 management console to log in. Access it with ease using auth0 apps open. Then, add the following URLs:
-
Callback:
<app-url>/login/oauth2/code/okta -
Logout:
<app-url>
Then, you can sign in to your app running on Knative! Add a note or two to prove it all works.
|
You will be charged for usage if you leave everything running on Google Cloud. Therefore, I recommend removing your cluster to reduce your cost. gcloud container clusters delete knative --zone=us-central1-c |
Use Cloud Native Buildpacks to Build Docker Images
Cloud Native Buildpacks is an initiative that Pivotal and Heroku started in early 2018. It has a pack CLI that allows you to build Docker images using buildpacks.
Unfortunately, pack doesn’t have great support for monorepos (especially in sub-directories) yet. I was unable to make it work with this app structure.
On the upside, Spring Boot’s built-in support for creating Docker images works splendidly!
Easy Docker Images with Spring Boot 2.3
Spring Boot 2.3.0 added built-in Docker support. This support leverages Cloud Native Buildpacks, just like the pack CLI.
Spring Boot’s Maven and Gradle plugins both have new commands:
-
./mvnw spring-boot:build-image -
./gradlew bootBuildImage
The Paketo Java buildpack is used by default to create images.
By default, Spring Boot will use your $artifactId:$version for the image name. That is, notes-api:0.0.1-SNAPSHOT. You can override this with an --imageName parameter.
Build and run the image with the commands below.
./gradlew bootBuildImage --imageName <your-username>/bootiful-angular -Pprod
docker-compose -f src/main/docker/app.yml up
You should be able to navigate to http://localhost:8080, log in, and add notes.
Pretty neat, don’t you think?
Summary
This final section showed you a lot of options when it comes to deploying your Angular and Spring Boot apps with Docker:
-
Build Angular containers with
Dockerfile -
Combine Angular and Spring Boot in a JAR
-
Build Docker images with Jib
-
Build Docker images with Cloud Native Buildpacks
You can download the code for this book’s examples from InfoQ. The angular-docker directory has this chapter’s completed example.
|
As a developer, you don’t want to read a book to get a baseline to start a project. The good news is JHipster does everything in this book. It allows you to run your Angular and Spring Boot apps separately, use Kotlin on the server, package your apps together for production, and use Docker for distribution. If you’re interested in JHipster, you’re in luck: there’s a JHipster Mini-Book! 🤓
In the meantime, I hope you enjoy your journey developing with Angular and Spring Boot! Please contact me at @mraible { on Twitter, LinkedIn, and GitHub } if you have any questions.