Angular Deployment
One of the more popular combinations of front-end and back-end frameworks is Angular + Spring Boot. Combining the two is possible—from keeping them as separate apps to combining them into a single artifact. But what about deployment?
Developers ask me from time to time, “What’s the best way to do Angular deployment?” In this section, I’ll show you several options. I’ll start by showing you how to deploy a Spring Boot app to Heroku. Then, I’ll show how to deploy a separate Angular app to Heroku.
There are many tutorials and information in the Java community on how to deploy Spring Boot apps, so I’ll leave the Spring Boot API on Heroku and show other Angular deployment options, including Firebase, Netlify, and AWS S3.

Create an Angular + Spring Boot App
If you’re following along, you should have an angular-bootstrap directory with an Angular and a Spring Boot app in it. It’s a note-taking app that uses Kotlin and Spring Boot on the back end and Angular on the front end. It’s secured with OpenID Connect (OIDC).
If you’d rather start from this point, download the examples for this book from InfoQ. The angular-bootstrap directory has the previous section’s completed example. Copy it to angular-deployment in your favorite code location.
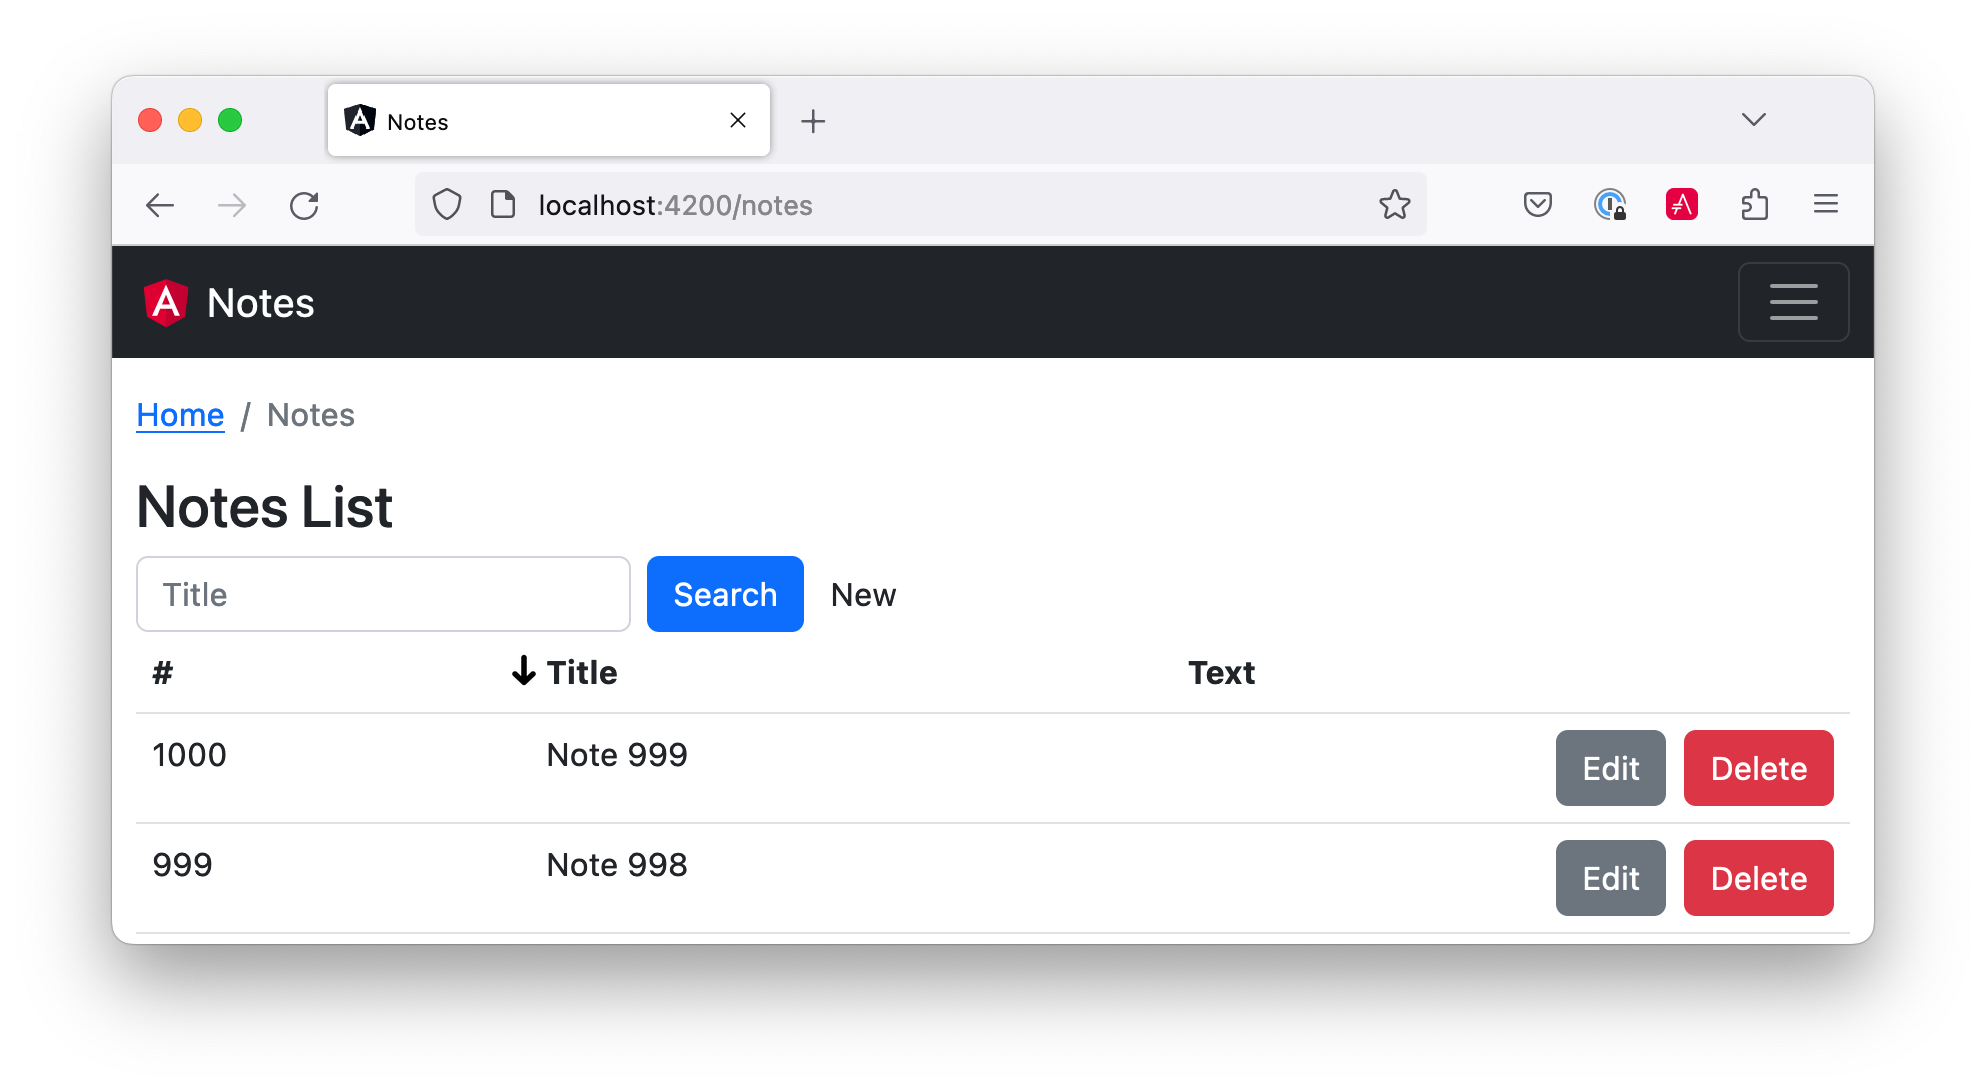
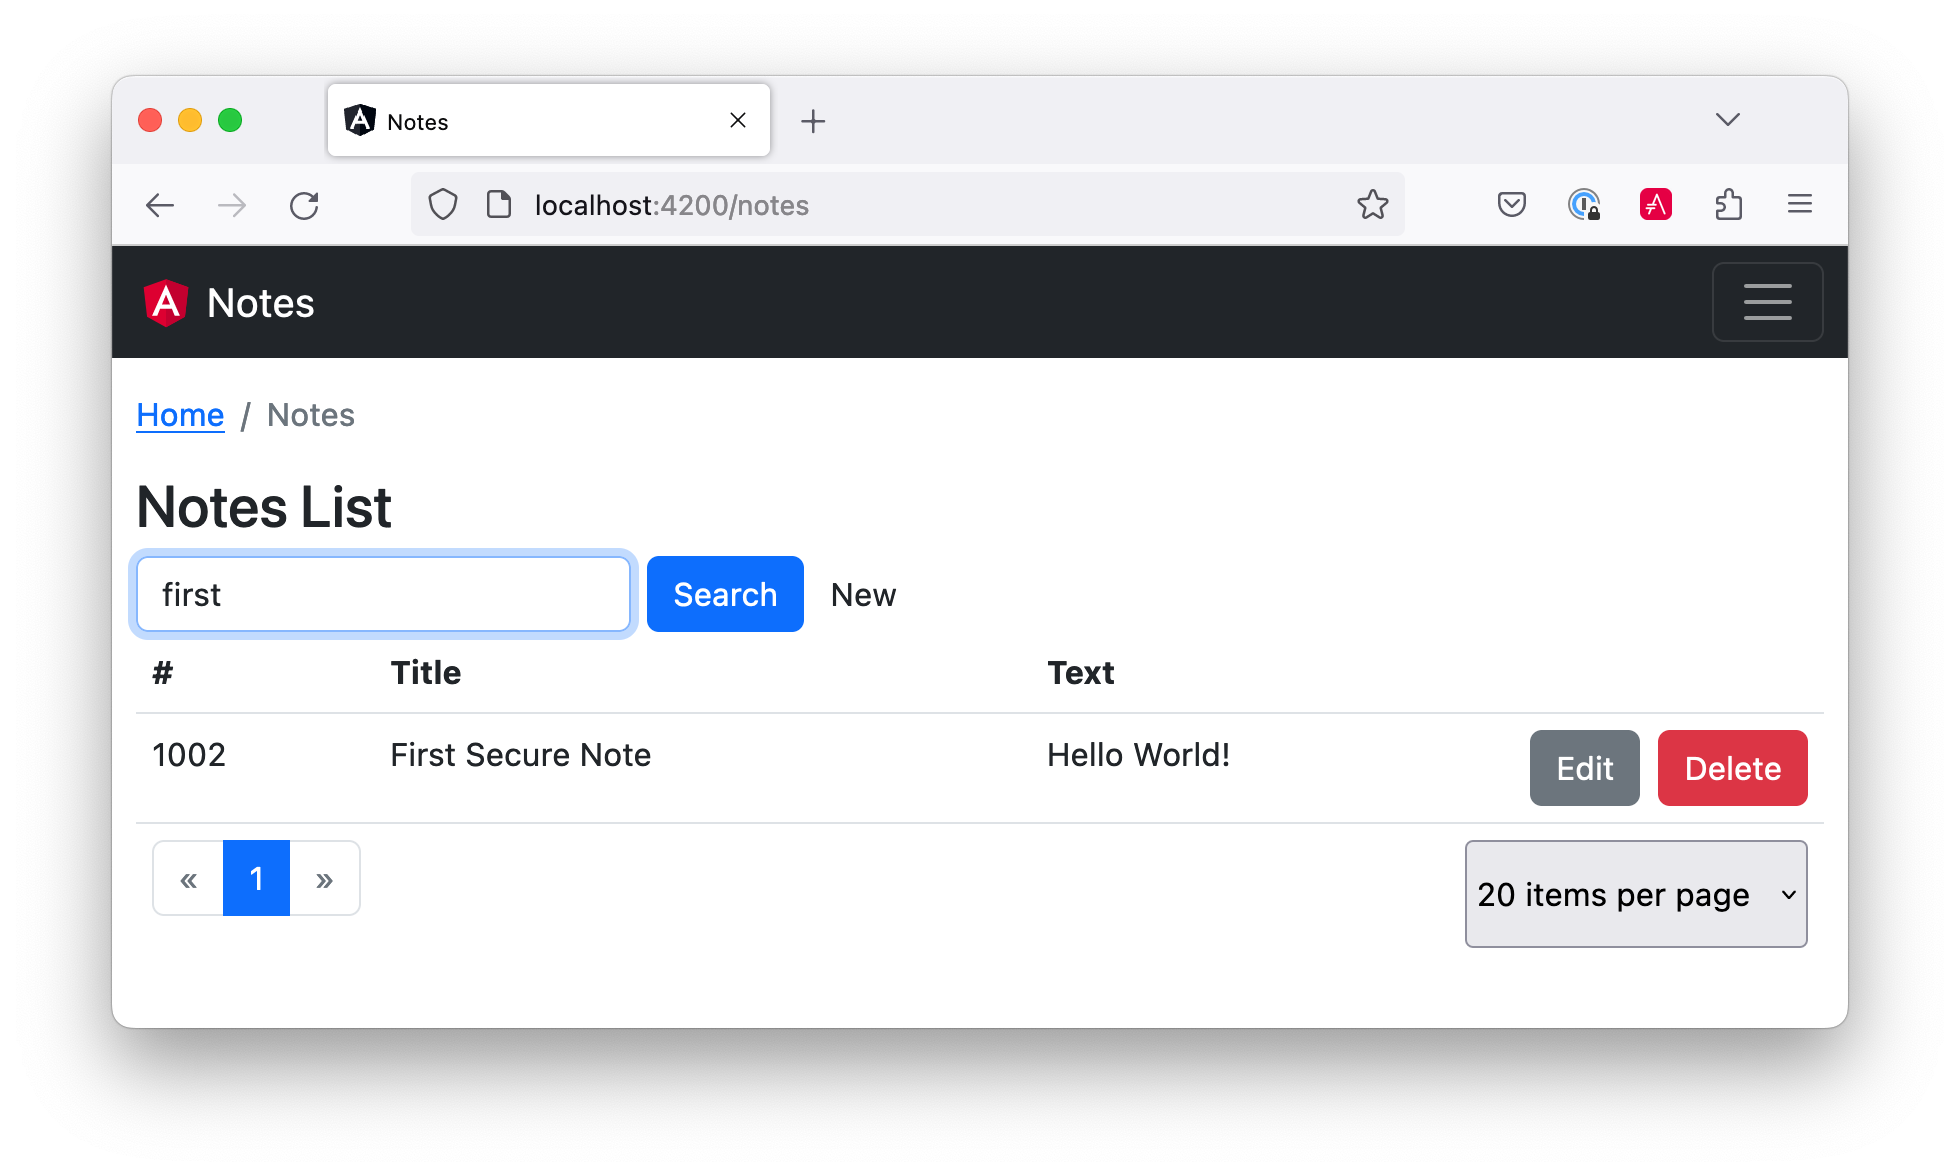
One of the slick features of this app is its full-featured data table that allows sorting, searching, and pagination. This feature is powered by NG Bootstrap and Spring Data JPA. Below is a screenshot:
Secure Your Angular + Spring Boot App with OIDC
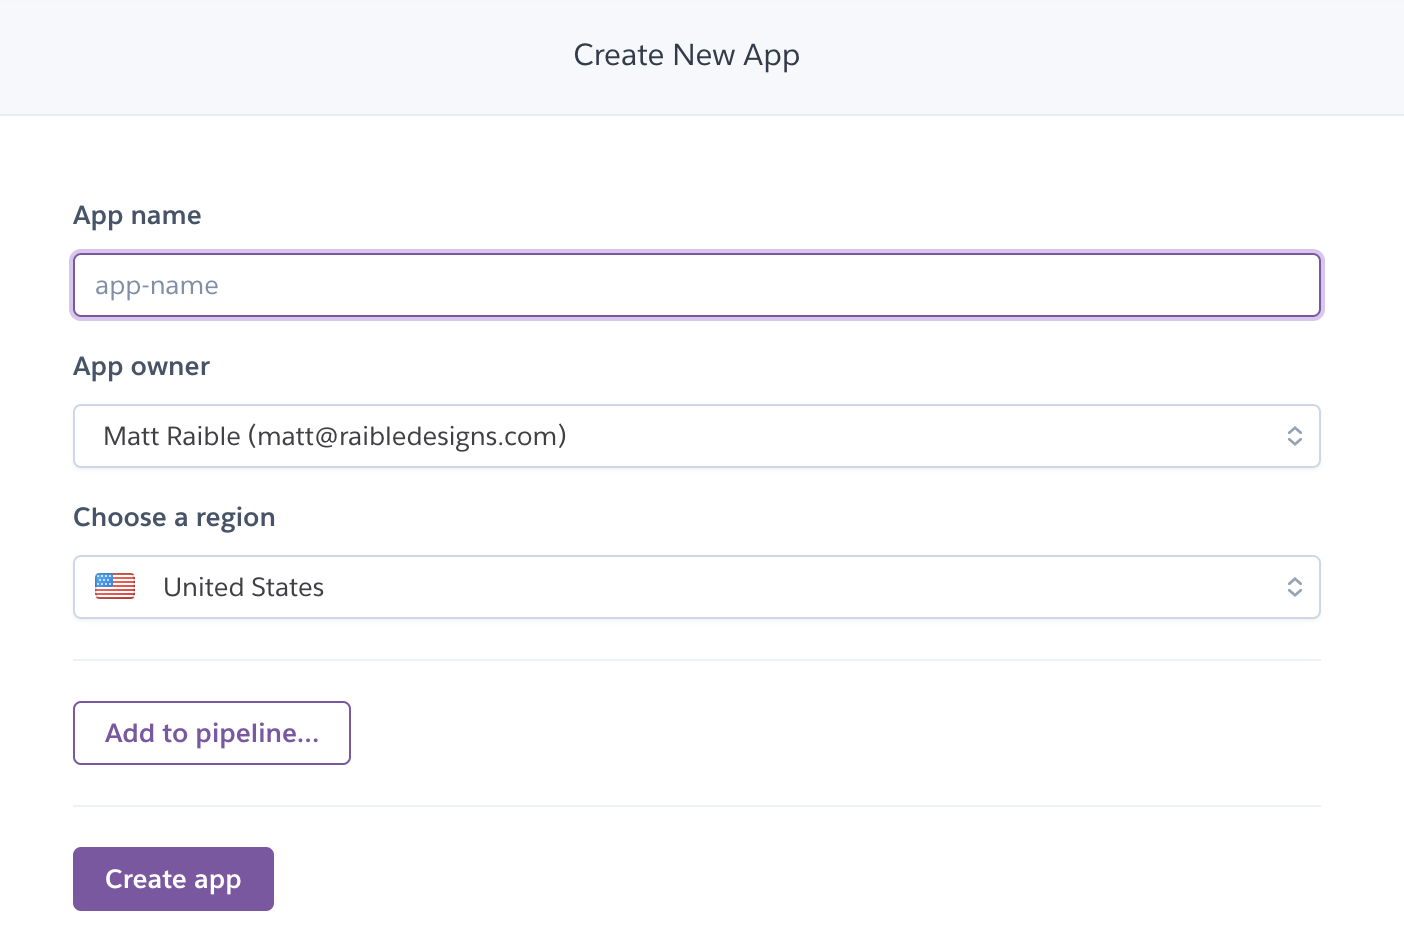
To begin, you must create a Heroku account. If you already have a Heroku account, log in to it. Once you’re logged in, create a new app. I named mine bootiful-angular.
After creating your app, you could select the Resources tab and add the Auth0 add-on. However, this will create a new Auth0 tenant for you and configure your Heroku app to use it. It’s easier to use the tenant you already configured.
Your Angular and Spring Boot apps should have their security configured to use OIDC from the last chapter. However, you’ll need to configure Auth0 for both the Angular and Spring Boot apps to allow Heroku URLs.
You can run auth0 apps list to get the client IDs for your Auth0 apps. Then, update the URLs for your Spring Boot app, replacing bootiful-angular with your Heroku app’s name.
auth0 apps update <spring-boot-client-id> \
  --callbacks http://localhost:8080/login/oauth2/code/okta,https://bootiful-angular.herokuapp.com/login/oauth2/code/okta \
  --logout-urls http://localhost:8080,https://bootiful-angular.herokuapp.com \
  --origins http://localhost:8080,https://bootiful-angular.herokuapp.com \
  --web-origins http://localhost:8080,https://bootiful-angular.herokuapp.com
Now you’ll need to set the OKTA_* environment variables on Heroku for your Spring Boot app. You can do this by running heroku config:set or using the Settings tab in the Heroku dashboard. You can also use the following command from the angular-deployment/notes-api directory. If you don’t have an .okta.env file in this directory, copy the one from the angular-bootstrap/notes-api directory.
source .okta.env
heroku config:set -a bootiful-angular \
OKTA_OAUTH2_ISSUER=$OKTA_OAUTH2_ISSUER \
OKTA_OAUTH2_CLIENT_ID=$OKTA_OAUTH2_CLIENT_ID \
OKTA_OAUTH2_CLIENT_SECRET=$OKTA_OAUTH2_CLIENT_SECRET \
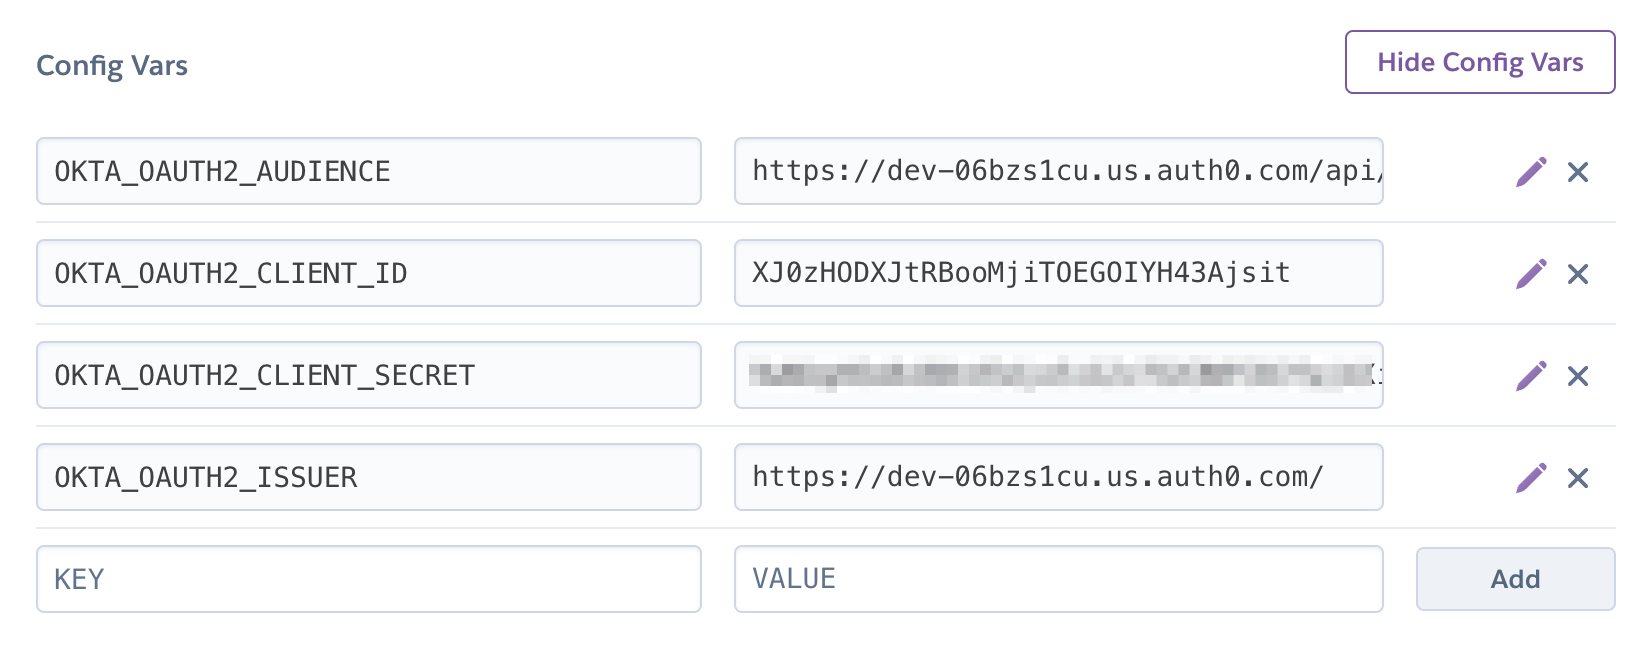
OKTA_OAUTH2_AUDIENCE=$OKTA_OAUTH2_AUDIENCEGo to your Heroku app’s Settings tab and click the Reveal Config Vars button. The Config Vars displayed are the environment variables you just set.
Deploy Your Angular + Spring Boot App to Heroku
Start your Spring Boot app by navigating to the notes-api directory, sourcing this file, and running ./gradlew bootRun.
source .okta.env
./gradlew bootRun|
Environment Variables in IntelliJ IDEA
If you’re using IntelliJ IDEA, you can copy the contents of 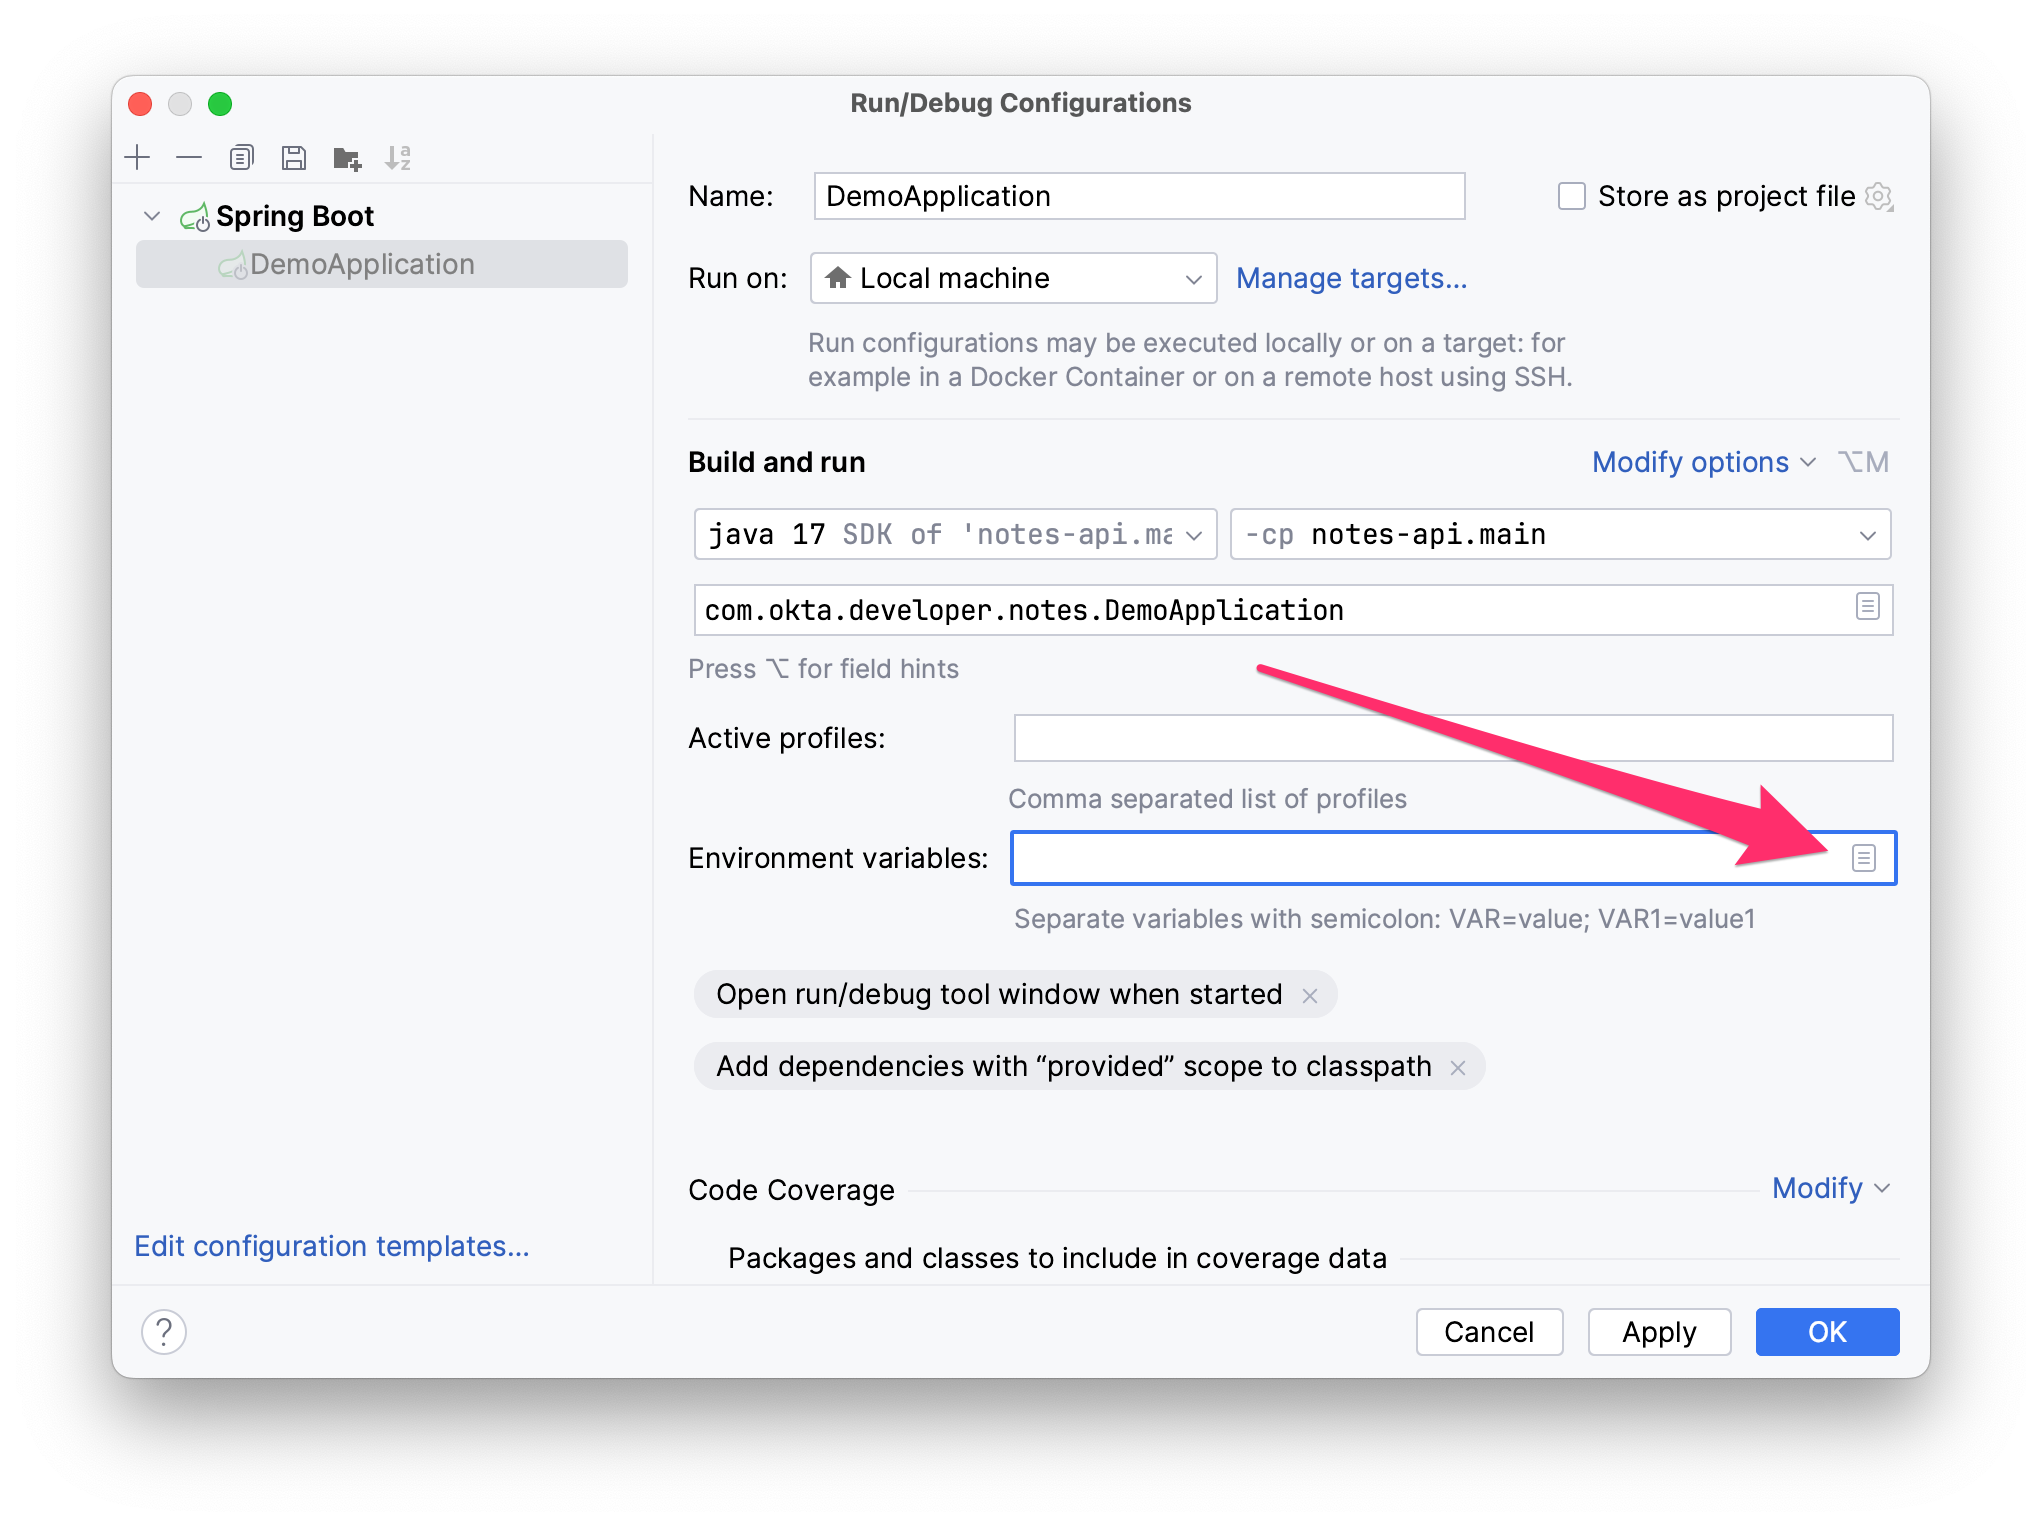
Figure 5. Edit DemoApplication Configuration
Next, click the paste icon. You’ll need to delete 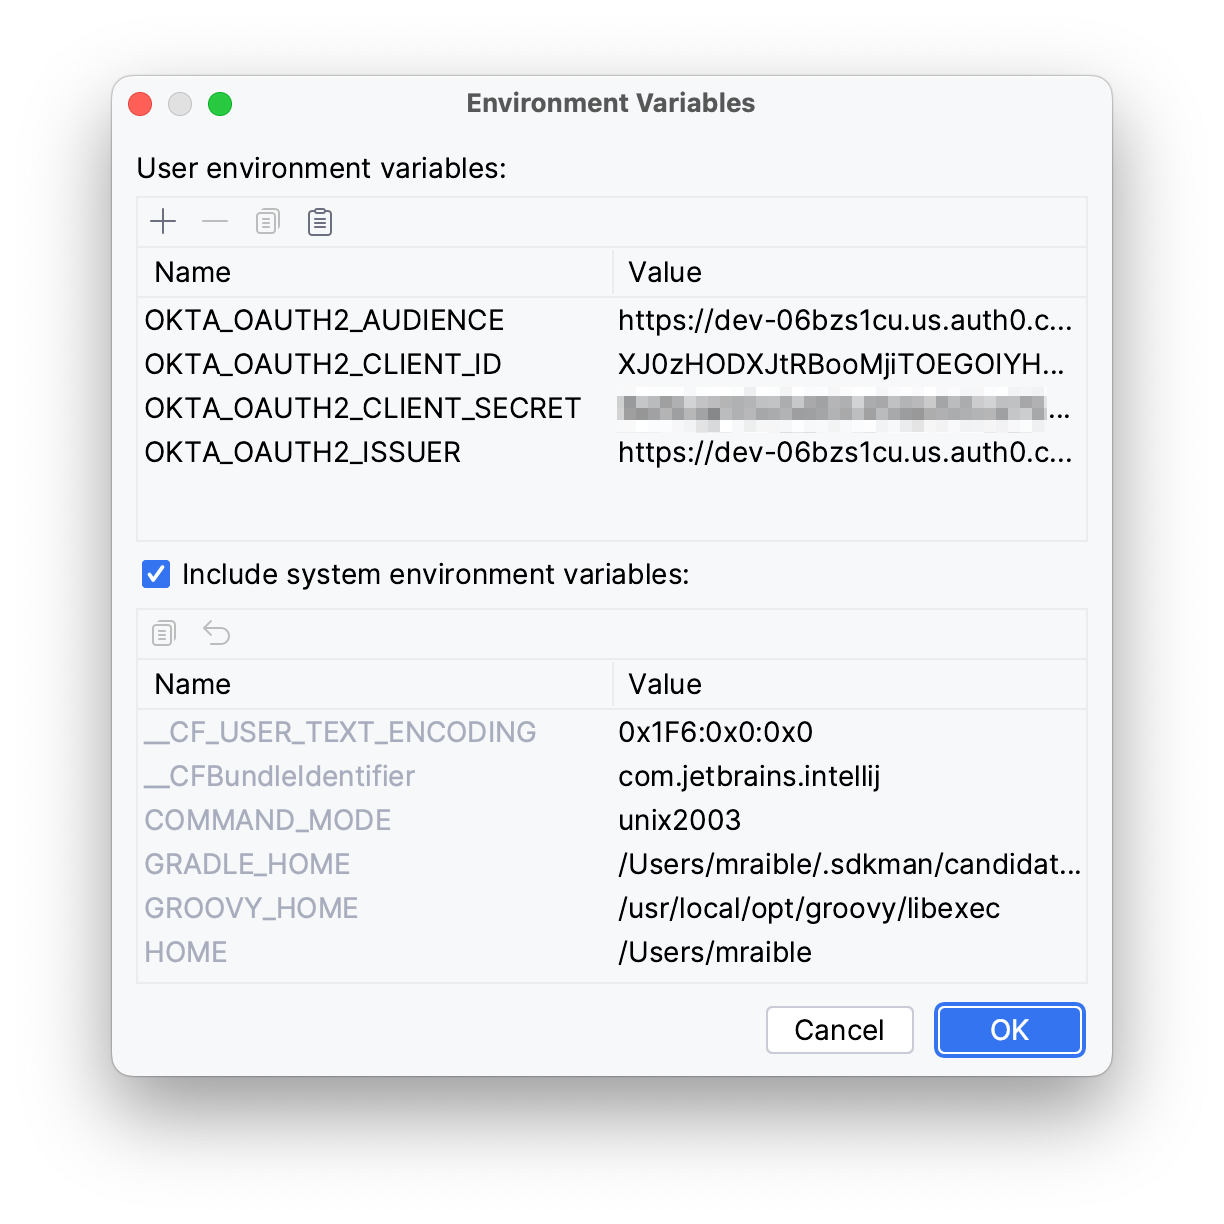
Figure 6. IntelliJ Environment Variables
|
Your Angular app should already be configured for OIDC authentication from the last chapter. However, if you registered a new SPA app on Auth0, you must modify auth-routing.module.ts to use the new client ID.
const config = {
  domain: '<your-auth0-domain>',
  clientId: '<your-client-id>',
  ...
};
Install your Angular app’s dependencies if you haven’t already, and start the application.
npm i
ng serve
Open http://localhost:4200 in your browser.
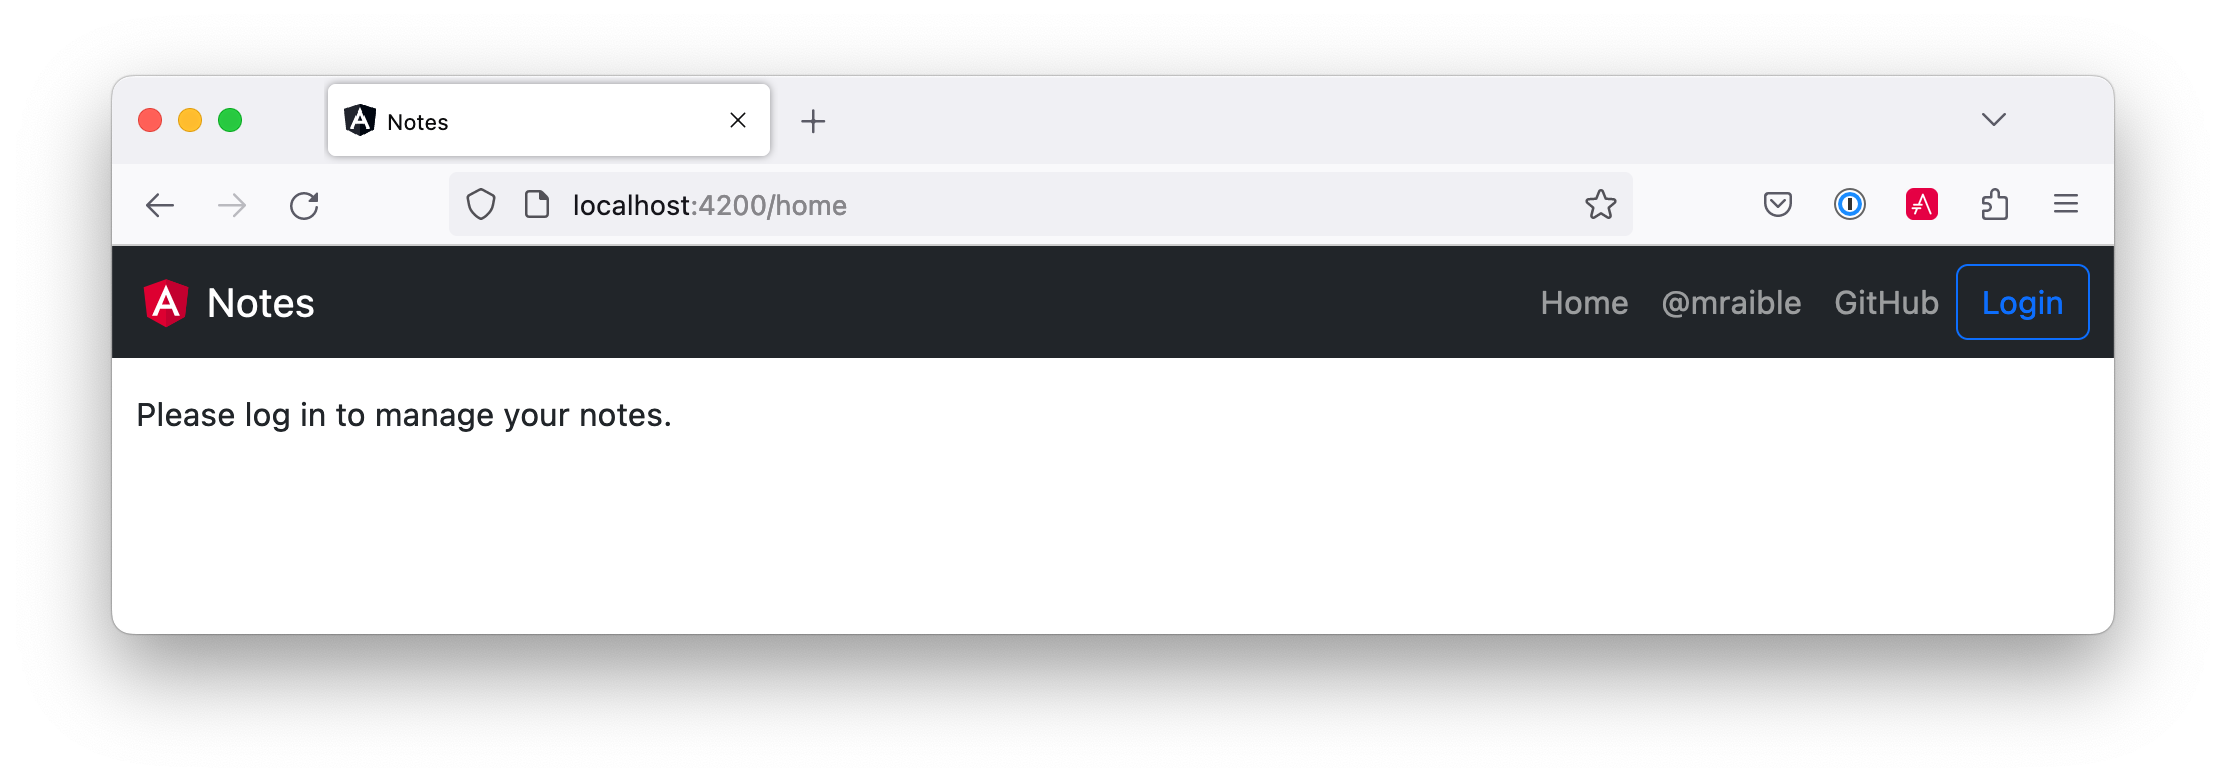
Click the Login button in the top right corner. You should be logged in immediately since you’re already logged in to Auth0. If you want to see the full authentication flow, log out, or try it in a private window. Create a note and search for its title to make sure everything works.
Prepare Angular + Spring Boot for Production
You should do a couple of things to make your app ready for production.
-
Make sure you’re using the latest releases
-
Configure production URLs
-
Use PostgreSQL for the production database
You’re going to want to continue to develop locally—so you’ll want a production mode as well as a development mode.
Update Spring Boot and Angular Dependencies
I’m the type of developer that likes to use the latest releases of open-source libraries. I do this to take advantage of new features, performance optimizations, and security fixes.
There’s a Gradle Use Latest Versions Plugin that provides a task to update dependencies to the latest version. Configure it by adding the following to the plugins block at the top of notes-api/build.gradle.kts.
plugins {
    ...
    id("se.patrikerdes.use-latest-versions") version "0.2.18"
    id("com.github.ben-manes.versions") version "0.46.0"
}
Then run the following command in the notes-api directory to update your dependencies to the latest released versions.
./gradlew useLatestVersionsYou can verify everything still works by running ./gradlew bootRun and navigating to http://localhost:8080/api/notes. You should be redirected to Auth0 to log in, then back to your app.
If your app fails to start, you must first run source .okta.env.
|
For the Angular client, you can use npm-check-updates to upgrade npm dependencies.
npx npm-check-updatesAt the time of this writing, npx npm-check-updates -u will upgrade auth0-angular from version 2.0.1 to 2.1.0 and TypeScript to version ~5.0.4. Since Angular 15 does not support TypeScript 5, you must downgrade it to version 4.9.5.
"typescript": "~4.9.5"
You can also use npm update, which is included in npm since v5.
|
Then run the following commands in the notes directory:
npm i
ng serve
Confirm you can still log in at http://localhost:4200.
Configure Production URLs
There are a few places where localhost is hard-coded:
-
notes-api/src/main/kotlin/…/DemoApplication.kthashttp://localhost:4200 -
notes/src/app/auth-routing.module.tshashttp://localhost:8080 -
notes/src/app/note/note.service.tshashttp://localhost:8080
You need to change Spring Boot’s code so other origins can make CORS requests, too. Angular’s code needs updating, so access tokens will be sent to production URLs while API requests are sent to the correct endpoint.
Open the root directory in your favorite IDE and configure it to load notes-api as a Gradle project. Open SecurityConfiguration.kt and change the corsConfigurationSource bean so it configures the allowed origins from your Spring environment.
import org.springframework.beans.factory.annotation.Value

@Configuration
class SecurityConfiguration {

    ...

    @Value("#{ @environment['allowed.origins'] ?: {} }")
    private lateinit var allowedOrigins: List<String>

    @Bean
    fun corsConfigurationSource(): CorsConfigurationSource {
        ...
        config.allowedOrigins = allowedOrigins
        ...
    }
}
Define the allowed.origins property in application.properties.
allowed.origins=http://localhost:4200Angular has an environment concept built-in. To use it, you first need to generate environments for your project.
ng generate environmentsOpen environment.development.ts and add an apiUrl variable for development. This file will be used when running ng serve.
export const environment = {
  production: false,
  apiUrl: 'http://localhost:8080'
};
Edit environment.ts to point to your production Heroku URL. Be sure to replace bootiful-angular with your app’s name.
export const environment = {
  production: true,
  apiUrl: 'https://bootiful-angular.herokuapp.com'
};
Update auth-routing.module.ts to use environment.apiUrl.
import { environment } from '../environments/environment';

const config = {
  ...
  httpInterceptor: {
    allowedList: [`${environment.apiUrl}/*`]
  },
};
Update notes.service.ts as well.
import { environment } from '../../environments/environment';
...

export class NoteService {
  ...
  api = `${environment.apiUrl}/api/notes`;
  ...

  find(filter: NoteFilter): Observable<Note[]> {
    ...

    const userNotes = `${environment.apiUrl}/user/notes`;
    ...
  }
}
Use PostgreSQL for the Production Database
H2 is a SQL database that works nicely for development. In production, you’re going to want something a little more robust. I like PostgreSQL, so I’ll use it in this example.
Similar to Angular’s environments, Spring and Maven have profiles that allow you to enable different behavior for different environments.
Open notes-api/build.gradle.kts and change the H2 dependency so PostgreSQL is used when -Pprod is passed in.
if (project.hasProperty("prod")) {
    runtimeOnly("org.postgresql:postgresql")
} else {
    runtimeOnly("com.h2database:h2")
}
Add the following code at the bottom of the file to make the prod profile the default when -Pprod is included in Gradle commands.
val profile = if (project.hasProperty("prod")) "prod" else "dev"

tasks.bootRun {
    args("--spring.profiles.active=${profile}")
}

tasks.processResources {
    rename("application-${profile}.properties", "application.properties")
}
Rename application.properties to application-dev.properties and add a URL for H2 so it persists to disk, which retains data through restarts.
allowed.origins=http://localhost:4200
spring.datasource.url=jdbc:h2:file:./build/h2db/notes;DB_CLOSE_DELAY=-1
spring.jpa.hibernate.ddl-auto=update
Create a notes-api/src/main/docker/postgresql.yml so you can test your prod profile settings.
version: '3.8'
services:
  notes-postgresql:
    image: postgres:15.2
    environment:
      - POSTGRES_USER=notes
      - POSTGRES_PASSWORD=@-xYcoZn2
    # If you want to expose these ports outside your computer,
    # remove the "127.0.0.1:" prefix
    ports:
      - 127.0.0.1:5432:5432
Create an application-prod.properties file in the same directory as application-dev.properties. You’ll override these properties with environment variables when you deploy to Heroku.
allowed.origins=http://localhost:4200
spring.jpa.database-platform=org.hibernate.dialect.PostgreSQLDialect
spring.jpa.hibernate.ddl-auto=update
spring.datasource.url=jdbc:postgresql://localhost:5432/notes
spring.datasource.username=notes
spring.datasource.password=@-xYcoZn2
You won’t want to pre-populate your production database with a bunch of notes, so add a @Profile annotation to the top of DataInitializer so it only runs for the dev profile.
import org.springframework.context.annotation.Profile
...

@Component
@Profile("dev")
class DataInitializer(val repository: NotesRepository) : ApplicationRunner {...}
To test your profiles, start PostgreSQL using Docker Compose.
docker compose -f src/main/docker/postgresql.yml up| If you have PostgreSQL installed and running locally, you’ll need to stop the process for Docker Compose to work. |
In another terminal, run your Spring Boot app.
source .okta.env
./gradlew bootRun -Pprod
If it starts OK, confirm your Angular app can talk to it and get ready to deploy to production!
Deploy Spring Boot to Heroku
One of the easiest ways to interact with Heroku is with the Heroku CLI. Install it before proceeding with the instructions below.
brew tap heroku/brew && brew install herokuOpen a terminal and log in to your Heroku account.
heroku loginHeroku expects you to have one Git repo per application. However, in this particular example, multiple apps exist in the same repo. This is called a “monorepo.”
Luckily, there’s a heroku-buildpack-monorepo that allows you to deploy multiple apps from the same repo.
You should already have a Heroku app configured with Auth0 environment variables. Let’s use it for hosting Spring Boot. Run heroku apps to see the one you created.
$ heroku apps
=== matt@raibledesigns.com Apps
bootiful-angular
You can run heroku config -a $APP_NAME to see your Auth0 variables. In my case, I’ll be using bootiful-angular for $APP_NAME.
APP_NAME=bootiful-angularCheck your project into Git and associate it with the app on Heroku.
git init
git add .
git commit -m "Initial commit"
heroku git:remote -a $APP_NAME
Set the APP_BASE config variable to point to the notes-api directory. While you’re there, add the monorepo and Gradle buildpacks.
heroku config:set APP_BASE=notes-api
heroku buildpacks:add https://github.com/lstoll/heroku-buildpack-monorepo
heroku buildpacks:add heroku/gradle
Attach a PostgreSQL database to your app.
heroku addons:create heroku-postgresqlHeroku will create a DATABASE_URL configuration variable as part of this process. It will also automatically detect Spring Boot and set variables for SPRING_DATASOURCE_URL, SPRING_DATASOURCE_USERNAME, and SPRING_DATASOURCE_PASSWORD. These values will override what you have in application-prod.properties.
By default, Heroku’s Gradle support runs ./gradlew build -x test. Since you want it to run ./gradlew bootJar -Pprod, you must override it by setting a GRADLE_TASK config var.
heroku config:set GRADLE_TASK="bootJar -Pprod"Tell Heroku to use Java 17 by creating a notes-api/system.properties and specifying the Java runtime version:
java.runtime.version=17Commit this file so it’s included in your deployment.
git add system.properties
git commit -m "Use Java 17 on Heroku"
Now you’re ready to deploy! Take a deep breath and witness how Heroku can deploy your Spring Boot + Kotlin app with a simple git push.
git push heroku mainWhen I ran this command, I received this output:
remote: Compressing source files... done.
remote: Building source:
remote:
remote: -----> Building on the Heroku-22 stack
remote: -----> Using buildpacks:
remote: 1. https://github.com/lstoll/heroku-buildpack-monorepo
remote: 2. heroku/gradle
remote: -----> Monorepo app detected
remote: Copied notes-api to root of app successfully
remote: -----> Gradle app detected
remote: -----> Spring Boot detected
remote: -----> Installing OpenJDK 17... done
remote: -----> Building Gradle app...
remote: -----> executing ./gradlew bootJar -Pprod
remote: Downloading https://services.gradle.org/distributions/gradle-7.6.1-bin.zip
remote: ........................................................................
remote: > Task :processResources
remote: > Task :compileKotlin
remote: > Task :compileJava NO-SOURCE
remote: > Task :classes
remote: > Task :bootJarMainClassName
remote: > Task :bootJar
remote:
remote: BUILD SUCCESSFUL in 1m 29s
remote: 4 actionable tasks: 4 executed
remote: -----> Discovering process types
remote: Procfile declares types -> (none)
remote: Default types for buildpack -> web
remote:
remote: -----> Compressing...
remote: Done: 112.1M
remote: -----> Launching...
remote: Released v12
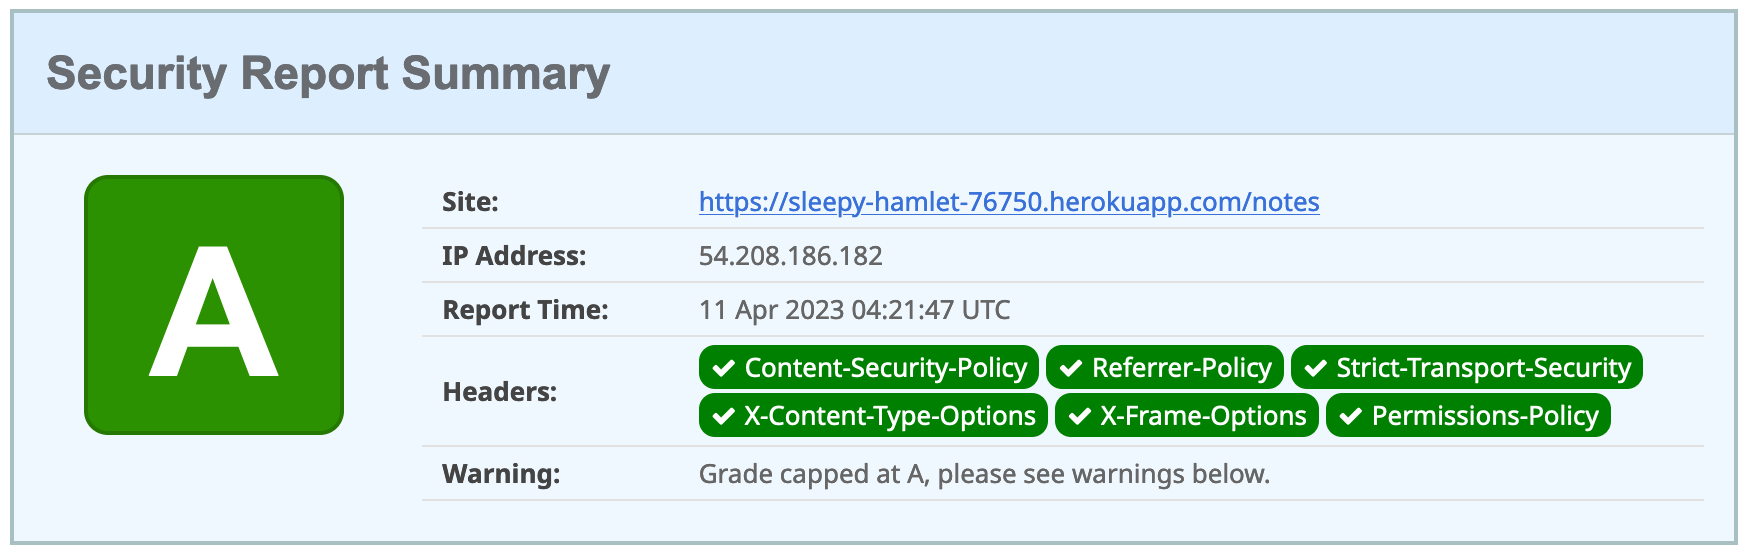
remote: https://bootiful-angular.herokuapp.com/ deployed to Heroku
remote:
remote: Verifying deploy... done.
To https://git.heroku.com/bootiful-angular.git
* [new branch] main -> main
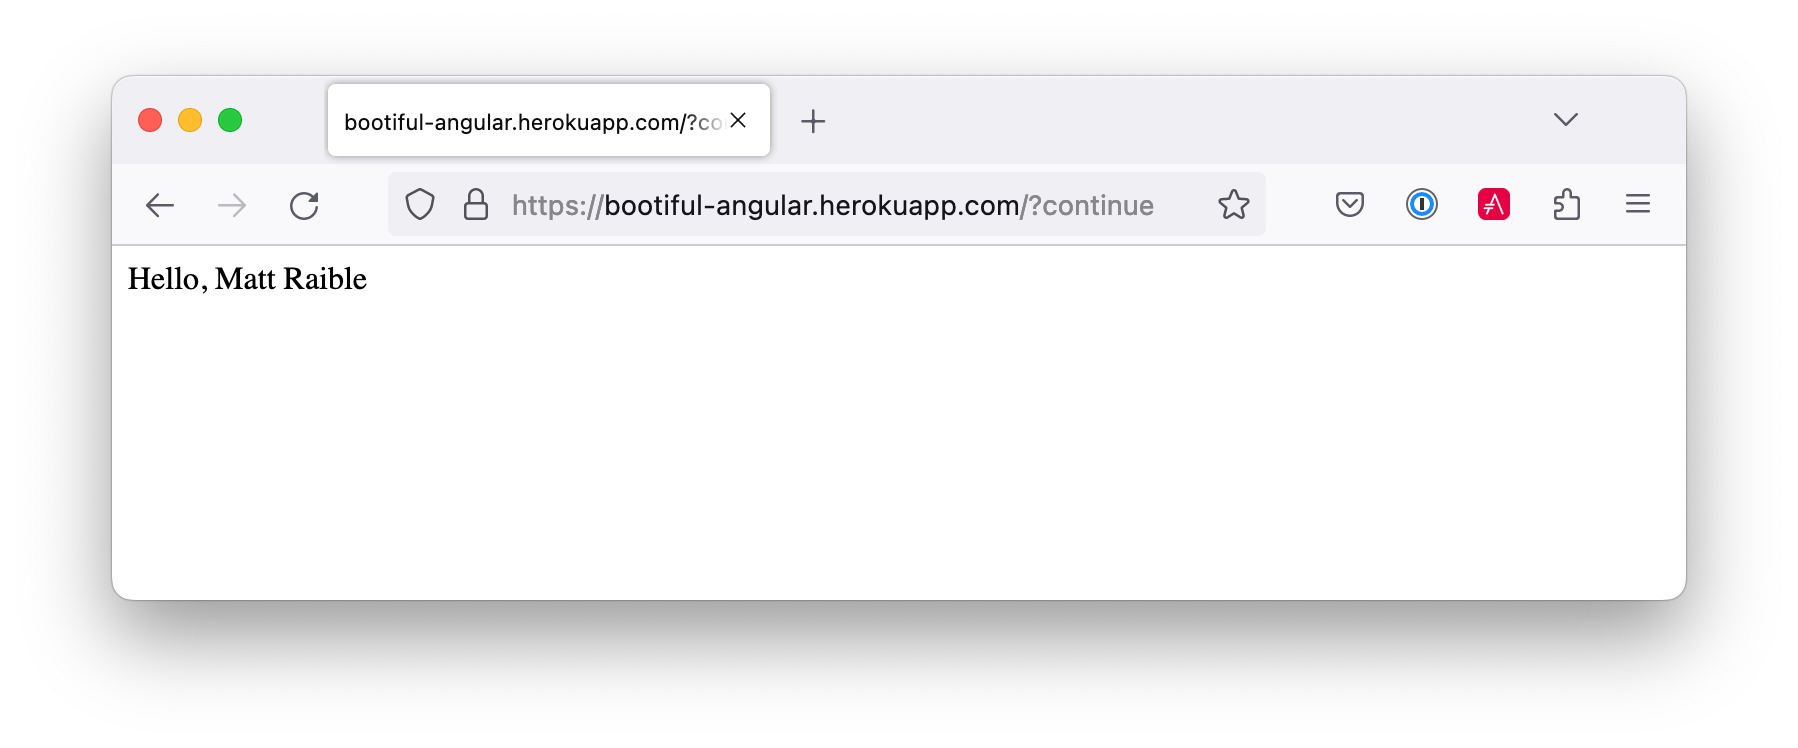
Execution time: 2 min. 17 s.Run heroku open to open your app. You’ll be redirected to Auth0 to authenticate, then back to your app. It will display a 404 error message because you have nothing mapped to /. You can fix that by adding a HomeController with the following code:
package com.okta.developer.notes

import org.springframework.security.core.annotation.AuthenticationPrincipal
import org.springframework.security.oauth2.core.oidc.user.OidcUser
import org.springframework.web.bind.annotation.GetMapping
import org.springframework.web.bind.annotation.RestController

@RestController
class HomeController {

    @GetMapping("/")
    fun hello(@AuthenticationPrincipal user: OidcUser): String {
        return "Hello, ${user.fullName}"
    }
}
Commit this change and run git push heroku main to update your app on Heroku.
Now when you access the app, it should say hello.
Deploy Angular to Heroku with Secure Headers
An Angular app is composed of JavaScript, CSS, and HTML when built for production. It’s extremely portable because it’s just a set of static files. If you run ng build, the production-ready files will be created in dist/<app-name>. In this section, you’ll learn how to use your package.json scripts to hook into Heroku’s lifecycle and deploy them with a simple git push.
You’ll need to create another app on Heroku for the Angular front end.
heroku createSet the APP_BASE config variable and add the necessary buildpacks to the newly created app.
APP_NAME=<app-name-from-heroku-create>
heroku config:set APP_BASE=notes -a $APP_NAME
heroku buildpacks:add https://github.com/lstoll/heroku-buildpack-monorepo -a $APP_NAME
heroku buildpacks:add heroku/nodejs -a $APP_NAME
Change notes/package.json to have a different start script.
"start": "npx http-server-spa dist/notes index.html $PORT",Add a heroku-postbuild script to your package.json:
"heroku-postbuild": "ng build"Commit your changes, add a new Git remote for this app, and deploy!
git commit -am "Prepare for Heroku"
git remote add angular https://git.heroku.com/$APP_NAME.git
git push angular main
When it finishes deploying, you can open your Angular app with:
heroku open --remote angular
If you experience any issues, you can run heroku logs --remote angular to see your app’s log files.
|
You won’t be able to log in to your app until you modify its Allowed Callback URLs on Auth0 to allow Heroku. You can do this with the Auth0 CLI:
auth0 apps list # to get Angular client ID
auth0 apps update <angular-client-id> \
  --callbacks http://localhost:4200/home,https://$APP_NAME.herokuapp.com/home \
  --logout-urls http://localhost:4200,https://$APP_NAME.herokuapp.com \
  --origins http://localhost:4200,https://$APP_NAME.herokuapp.com \
  --web-origins http://localhost:4200,https://$APP_NAME.herokuapp.com
You should be able to log in now, but you won’t be able to add any notes. You need to update the allowed origins in your Spring Boot app. Run the following command to add an ALLOWED_ORIGINS variable in your Spring Boot app.
heroku config:set ALLOWED_ORIGINS=https://$APP_NAME.herokuapp.com --remote herokuNow you should be able to add a note. Pat yourself on the back for a job well done!
One issue you’ll experience is that you’ll lose your data between restarts. This is because Hibernate is configured to update your database schema each time. Change it to simply validate your schema by overriding the ddl-auto value in application-prod.properties.
heroku config:set SPRING_JPA_HIBERNATE_DDL_AUTO=validate --remote herokuSecure Angular Apps on Heroku
You’ve deployed your app to Heroku, but there are still a couple of security issues. First, if you access it using http (instead of https), it won’t work. You’ll get an error from the Auth0 Angular SDK in your browser’s console.
The second issue is that you’ll score an F when you test it using securityheaders.com. Heroku has a blog post on using HTTP headers to secure your site that will help you improve your score.
Create a notes/config/nginx.conf.erb file with the configuration for secure headers and redirect all HTTP requests to HTTPS.
daemon off;
# Heroku dynos have at least 4 cores.
worker_processes <%= ENV['NGINX_WORKERS'] || 4 %>;

events {
	use epoll;
	accept_mutex on;
	worker_connections <%= ENV['NGINX_WORKER_CONNECTIONS'] || 1024 %>;
}

http {
	gzip on;
	gzip_comp_level 2;
	gzip_min_length 512;
	gzip_proxied any; # Heroku router sends Via header

	server_tokens off;

	log_format l2met 'measure#nginx.service=$request_time request_id=$http_x_request_id';
	access_log <%= ENV['NGINX_ACCESS_LOG_PATH'] || 'logs/nginx/access.log' %> l2met;
	error_log <%= ENV['NGINX_ERROR_LOG_PATH'] || 'logs/nginx/error.log' %>;

	include mime.types;
	default_type application/octet-stream;
	sendfile on;

	# Must read the body in 5 seconds.
	client_body_timeout <%= ENV['NGINX_CLIENT_BODY_TIMEOUT'] || 5 %>;

	server {
		listen <%= ENV["PORT"] %>;
		server_name _;
		keepalive_timeout 5;
		client_max_body_size <%= ENV['NGINX_CLIENT_MAX_BODY_SIZE'] || 1 %>M;

		root dist/notes;
		index index.html;

		location / {
			try_files $uri /index.html;
		}

		add_header Content-Security-Policy "default-src 'self'; script-src 'self' 'unsafe-inline'; style-src 'self' 'unsafe-inline'; img-src 'self' data:; font-src 'self' data:; frame-ancestors 'none'; connect-src 'self' https://*.auth0.com https://*.herokuapp.com; frame-src 'self' https://*.auth0.com";
		add_header Referrer-Policy "no-referrer, strict-origin-when-cross-origin";
		add_header Strict-Transport-Security "max-age=63072000; includeSubDomains";
		add_header X-Content-Type-Options nosniff;
		add_header X-Frame-Options DENY;
		add_header X-XSS-Protection "1; mode=block";
		add_header Permissions-Policy "geolocation=(self), microphone=(), accelerometer=(), camera=()";
	}
}
For config/nginx.conf.erb to be read, you have to use the Heroku NGINX buildpack.
Add a Procfile to the root of the notes directory.
web: bin/start-nginx-soloThe NGINX buildback is made for SPA applications, so you can revert the scripts section of your package.json back to what you had previously.
"scripts": {
  "ng": "ng",
  "start": "ng serve",
  "build": "ng build",
  "watch": "ng build --watch --configuration development",
  "test": "ng test"
},
Commit your changes to Git, add the Node.js + NGINX buildpack, and redeploy your Angular app.
git add .
git commit -m "Configure secure headers and nginx buildpack"
heroku buildpacks:add heroku/nodejs --remote angular
heroku buildpacks:add heroku-community/nginx --remote angular
git push angular main
Now you’ll have a security report you can be proud of!
Use ng deploy with Firebase, Netlify, and AWS
In Angular CLI v8.3.0, an ng deploy command was introduced to automate deploying to many different cloud providers. I thought it would be fun to try a few of these out and see if it’s possible to optimize the headers to get the same A rating that you were able to get with Heroku.
Below are the current providers and packages supported by this command.
| Hosting provider | Package |
|---|---|
AWS S3 |
|
Firebase |
|
GitHub pages |
|
Netlify |
|
NPM |
|
Vercel |
In the following section, I’ll show you how to deploy to a few that piqued my interest (Firebase, Netlify, and AWS S3).
Angular Deployment to Firebase
Create a firebase branch so you can make changes without affecting the work you’ve done for Heroku deployments.
git checkout -b firebaseOpen a browser and go to firebase.google.com. Log in to your account, go to the console, and create a new project.
Install the Firebase CLI and authenticate from your terminal:
npm install -g firebase-tools
firebase login --reauth
Run ng add @angular/fire in the notes directory, and your new project should appear in the list. When prompted for features to set up, select ng deploy — hosting.
ℹ Using package manager: npm
✔ Found compatible package version: @angular/fire@7.5.0.
✔ Package information loaded.

The package @angular/fire@7.5.0 will be installed and executed.
Would you like to proceed? Yes
✔ Packages successfully installed.
UPDATE package.json (1311 bytes)
✔ Packages installed successfully.
? What features would you like to setup? ng deploy -- hosting
Using firebase-tools version 11.25.3
? Which Firebase account would you like to use? mraible@gmail.com
✔ Preparing the list of your Firebase projects

? Please select a project: notes
? Please select a hosting site: https://notes-ed93c.web.app
CREATE .firebaserc (179 bytes)
UPDATE .gitignore (602 bytes)
UPDATE angular.json (3279 bytes)
UPDATE firebase.json (783 bytes)
Now you can run ng deploy and everything should work.
You must add the project’s URL as an allowed origin in your Spring Boot app on Heroku. Copy the printed Hosting URL value and run the following command:
heroku config:edit --remote herokuAdd the new URL after your existing Heroku one, separating them with a comma. For example:
ALLOWED_ORIGINS='https://sleepy-hamlet-76750.herokuapp.com,https://notes-ed93c.web.app'You’ll also need to modify your Auth0 SPA app to add your Firebase URL as an Allowed Callback URL, Allowed Logout URL, and Allowed Web Origin. You can use the Auth0 CLI and auth0 apps open to quickly access it. For mine, I added the following:
-
Allowed Callback URL:
https://notes-ed93c.web.app/home -
Allowed Logout URL:
https://notes-ed93c.web.app -
Allowed Web Origin:
https://notes-ed93c.web.app
Open your Firebase URL in your browser, log in, and you should be able to see the note you added on Heroku.
Strong Security Headers on Firebase
If you test your new Firebase site on securityheaders.com, you’ll score a D. Luckily, you can configure headers in your firebase.json file. Edit this file and modify the headers key like the following:
"headers": [
  {
    "source": "/**",
    "headers": [
      {
        "key": "Cache-Control",
        "value": "public,max-age=31536000,immutable"
      },
      {
        "key": "Content-Security-Policy",
        "value": "default-src 'self'; script-src 'self' 'unsafe-inline'; style-src 'self' 'unsafe-inline'; img-src 'self' data:; font-src 'self' data:; frame-ancestors 'none'; connect-src 'self' https://*.auth0.com https://*.herokuapp.com; frame-src 'self' https://*.auth0.com"
      },
      {
        "key": "Referrer-Policy",
        "value": "no-referrer, strict-origin-when-cross-origin"
      },
      {
        "key": "X-Content-Type-Options",
        "value": "nosniff"
      },
      {
        "key": "X-Frame-Options",
        "value": "DENY"
      },
      {
        "key": "X-XSS-Protection",
        "value": "1; mode=block"
      },
      {
        "key": "Permissions-Policy",
        "value": "geolocation=(self), microphone=(), accelerometer=(), camera=()"
      }
    ]
  },
  {
    "source": "/@(ngsw-worker.js|ngsw.json)",
    "headers": [
      {
        "key": "Cache-Control",
        "value": "no-cache"
      }
    ]
  }
],
You don’t need to include a Strict-Transport-Security header because Firebase includes it by default.
|
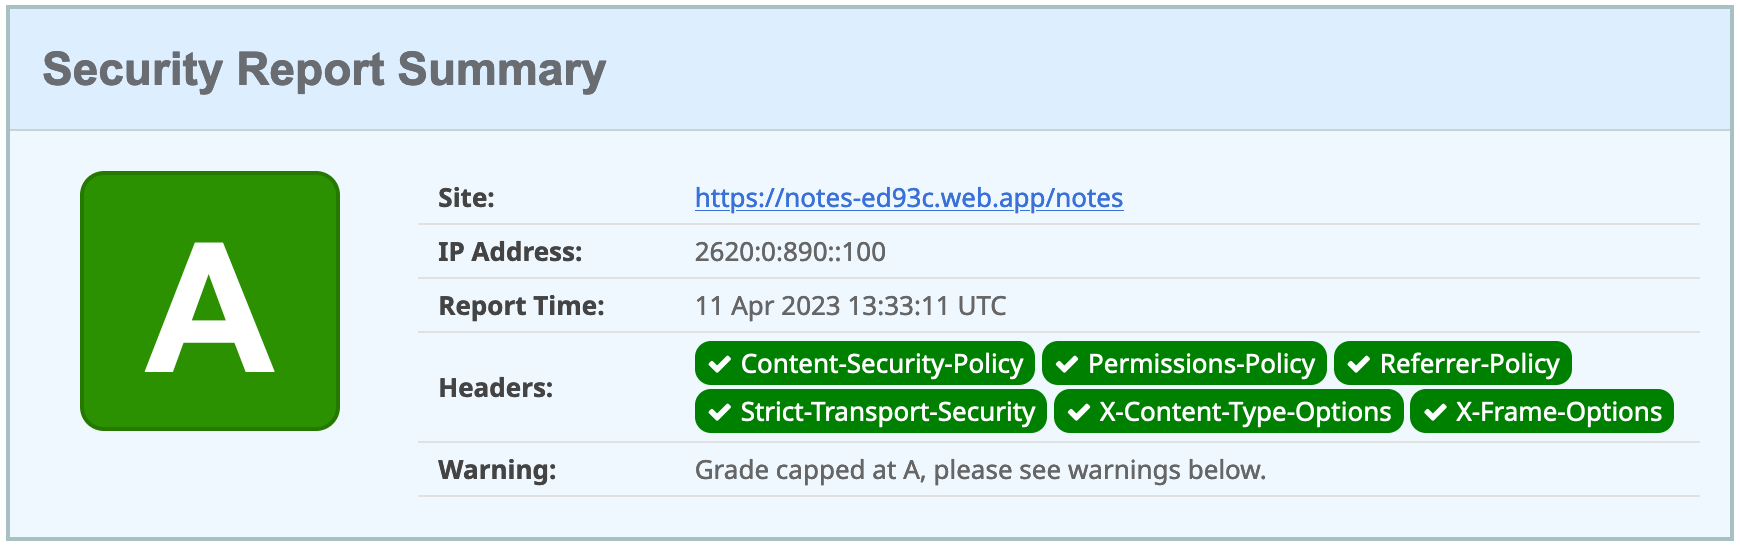
Run ng deploy and you should get an A now!
Commit your changes to your firebase branch.
git add .
git commit -m "Add Firebase deployment"
Angular Deployment to Netlify
Netlify is a hosting provider for static sites that I’ve enjoyed using. They offer continuous integration, HTML forms, AWS Lambda functions, and CMS functionality.
Check out your main branch and create a new netlify one.
git checkout main
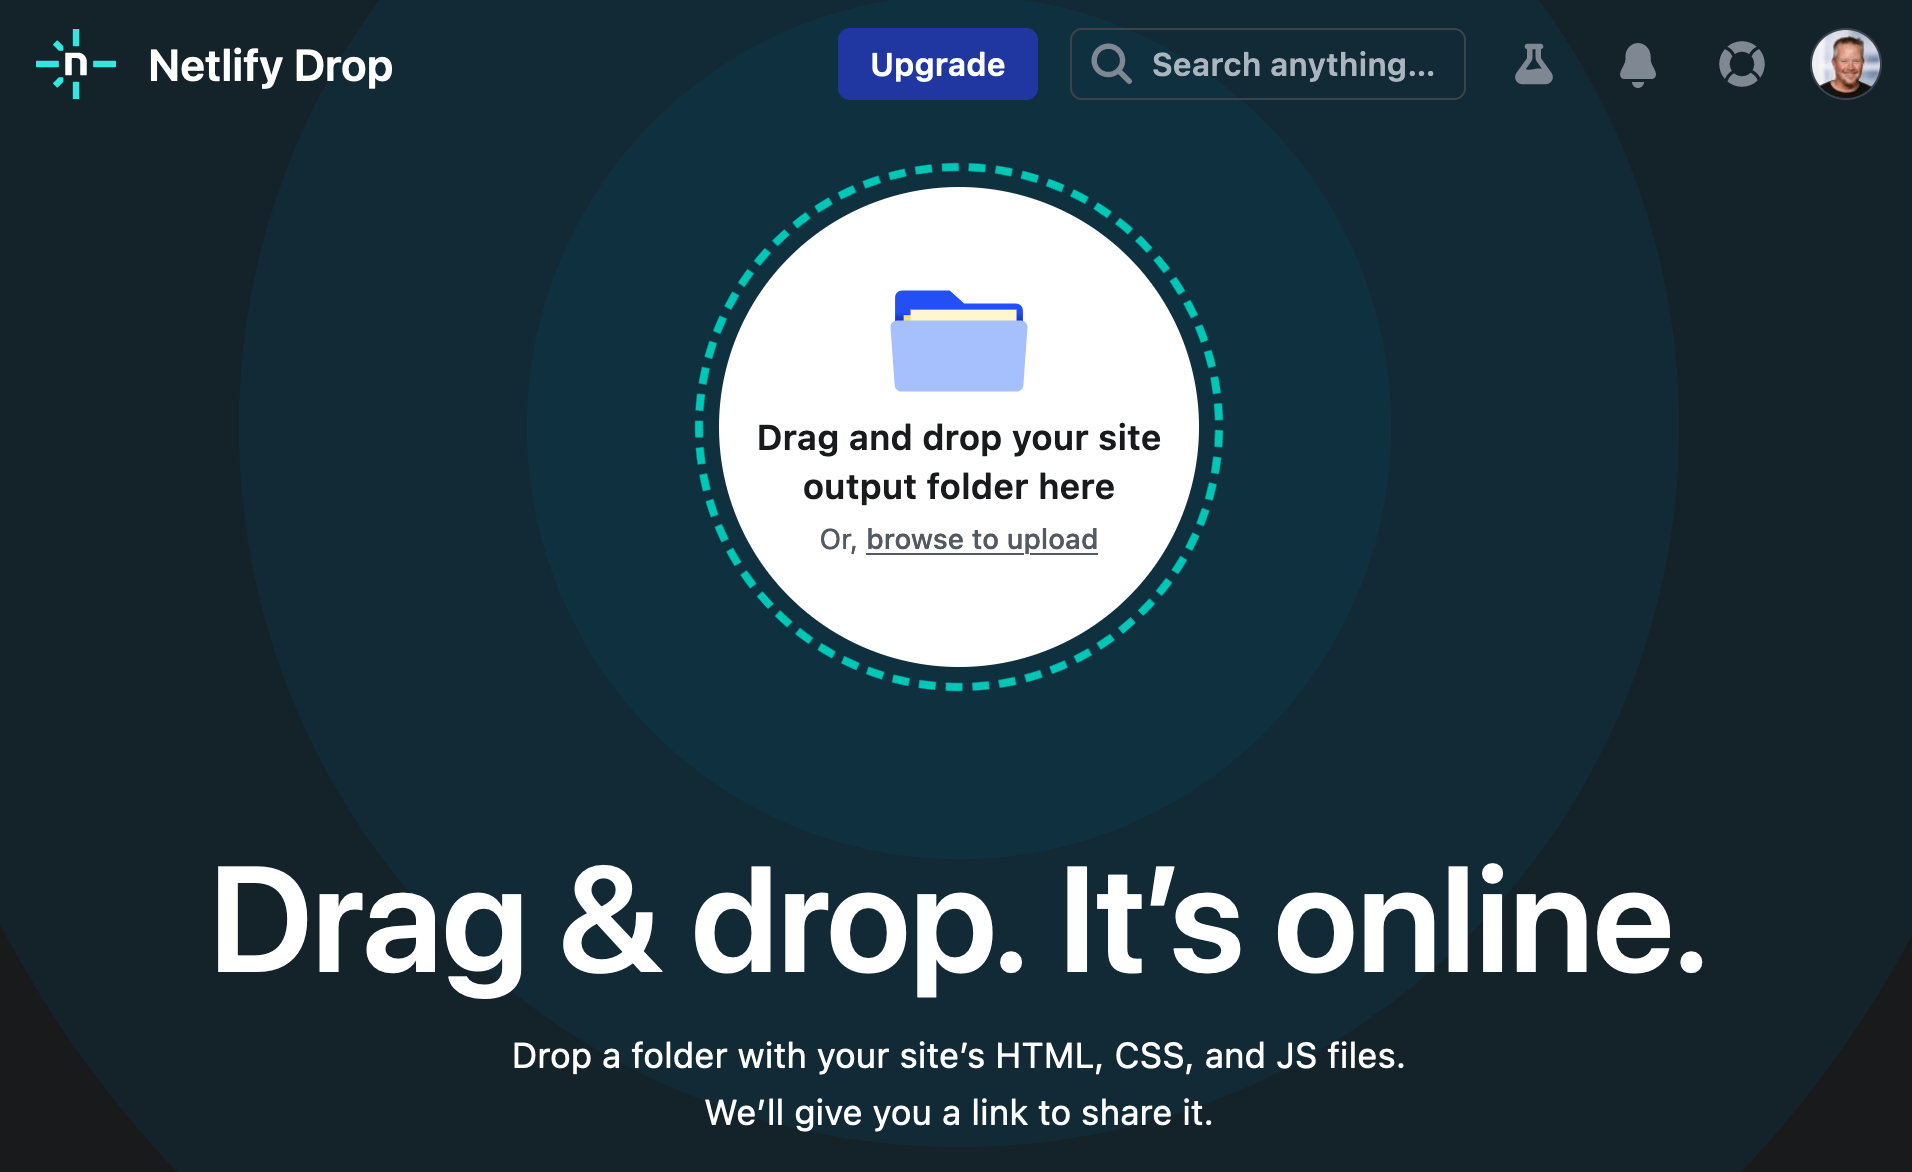
git checkout -b netlifyBefore running the command to add Netlify support, you must create a Netlify account. Once you’re signed in, create a new site by selecting Add new site > Deploy Manually. Netlify makes it easy to connect a site via Git, but since I want to demonstrate ng deploy, you’ll need to create a temporary directory with an index.html file in it. I put “Hello, World” in the HTML file, then dragged the directory into my browser window.
Click on your new site > Site Settings to copy your Site ID to a text editor. You’ll also need a personal access token. To create one, click on your avatar in the top right > User settings > Applications and click New access token. Copy the generated token to your text editor.
Run the command below to add Netlify deployment support.
ng add @netlify-builder/deployCopy and paste your API ID and personal access token when prompted, then run ng deploy to deploy your site.
Update your Spring Boot app on Heroku to allow your Netlify app URL:
heroku config:edit --remote herokuMake sure to append the URL to your existing ones, separating them with a comma.
ALLOWED_ORIGINS='...,https://dapper-baklava-050b77.netlify.app'You’ll also need to update your Auth0 Angular app to allow the URL as a callback, login, and web origin.
If you try to log in, you’ll get a Page Not Found error stemming from Auth0 trying to redirect back to your app. This happens because Netlify doesn’t know your app is a SPA that manages its routes. To fix this, create a _redirects file in the notes/src directory with the following contents:
/* /index.html 200| You can learn more about configuring Netlify for SPAs in their documentation. |
Then, modify angular.json to include this file in its assets.
"assets": [
  "src/_redirects",
  "src/favicon.ico",
  "src/assets"
],
Run ng deploy again, and you should be able to log in successfully.
Better Security Headers on Netlify
If you test your new Netlify site on securityheaders.com, you’ll score a D. To improve your score, Netlify allows you to add custom headers.
Create a src/_headers file with the following contents. Note that the first line in this file indicates “all paths under /”.
/*
  Content-Security-Policy: default-src 'self'; script-src 'self' 'unsafe-inline'; style-src 'self' 'unsafe-inline'; img-src 'self' data:; font-src 'self' data:; frame-ancestors 'none'; connect-src 'self' https://*.auth0.com https://*.herokuapp.com; frame-src 'self' https://*.auth0.com
  Referrer-Policy: no-referrer, strict-origin-when-cross-origin
  X-Content-Type-Options: nosniff
  X-Frame-Options: DENY
  X-XSS-Protection: 1; mode=block
  Permissions-Policy: geolocation=(self), microphone=(), accelerometer=(), camera=()
You don’t need to include a Strict-Transport-Security header because Netlify includes one by default.
|
Modify angular.json to include this file in its assets.
"assets": [
  "src/_headers",
  "src/_redirects",
  "src/favicon.ico",
  "src/assets"
],
Run ng deploy and you should get an A now!

Commit your changes to the netlify branch.
git add .
git commit -am "Add Netlify deployment"|
The Netlify schematic writes your access token to I was notified of this issue by GitGuardian, which I use to monitor my repos. If you check in this change, make sure to delete the access token on Netlify. |
Angular Deployment to AWS S3
Amazon Simple Storage Service (Amazon S3) is an object storage service popular for hosting static sites.
Check out your main branch and create a new aws one.
git checkout main
git checkout -b aws
Before running the command to add S3 deployment support, you’ll need a few things:
-
An S3 Bucket
-
An AWS Region Name
-
A Secret Access Key
-
An Access Key ID
You’ll also need to create an AWS account. After creating an account, go to the Amazon S3 console. Click Create Bucket and give it a name you’ll remember. Use the default region selected for you and click Create Bucket.
To create the secret access key, go to your security credentials page. Scroll down to the Access keys section and select Create access key. Click Show and copy the key name and value into a text editor.
| If you have trouble creating a secret access key, see this blog post. |
Add the @jefiozie/ngx-aws-deploy package to deploy to S3:
ng add @jefiozie/ngx-aws-deployYou won’t be prompted for your AWS settings because the authors have realized it’s not a good idea to add secrets to angular.json.
Run ng deploy with your AWS setting to deploy your Angular app to your AWS S3 bucket.
NG_DEPLOY_AWS_ACCESS_KEY_ID=<KEY_ID> NG_DEPLOY_AWS_SECRET_ACCESS_KEY=<KEY> \
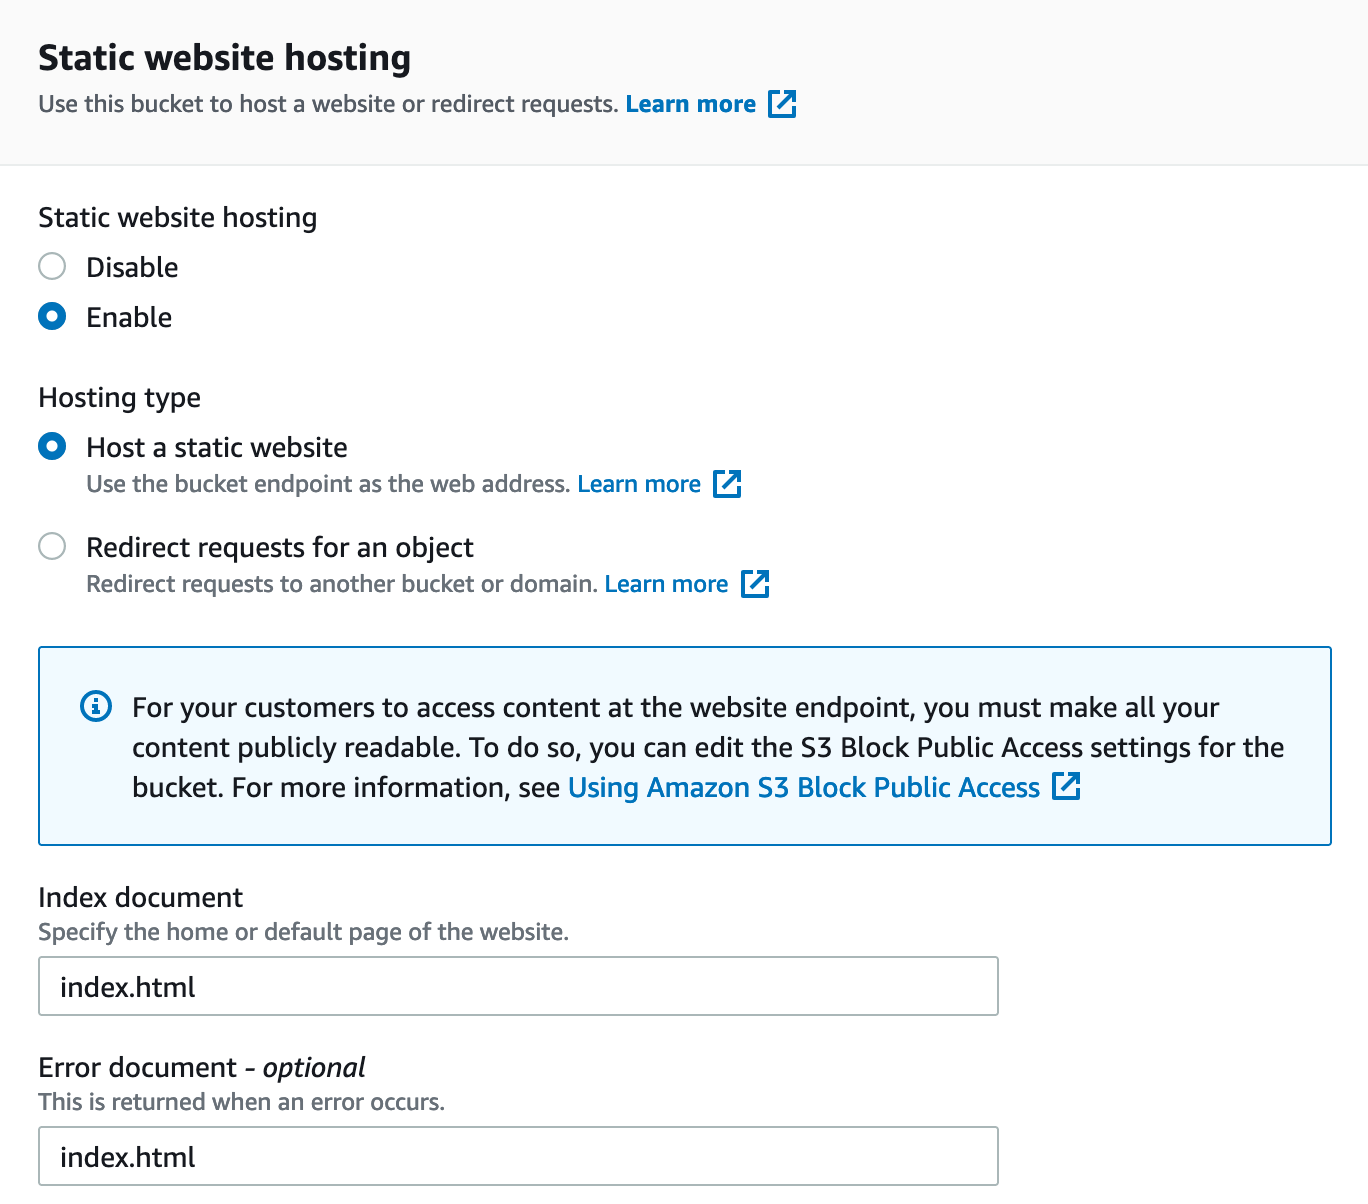
NG_DEPLOY_AWS_BUCKET=<BUCKET_NAME> NG_DEPLOY_AWS_REGION=<REGION> ng deployNext, you need to configure S3 for static website hosting. Go to your bucket > Properties > Static website hosting > Edit.
Type index.html for the index and error document and click Save changes.
By default, Amazon S3 blocks public access to your buckets. Go to the Permissions tab. Click the Edit button, clear Block all public access, and click Save changes.
The last step you need to do to make it public is to add a bucket policy. Go to Permissions > Bucket Policy > Edit and paste the following into the editor, replacing <your-bucket-name> with your bucket’s name.
{
    "Version": "2012-10-17",
    "Statement": [
        {
            "Sid": "PublicReadGetObject",
            "Effect": "Allow",
            "Principal": "*",
            "Action": ["s3:GetObject"],
            "Resource": ["arn:aws:s3:::<your-bucket-name>/*"]
        }
    ]
}
Click Save changes to continue.
At this point, you could navigate to http://<bucket-name>.s3-website-<region-name>.amazonaws.com in your browser, and the application will try to load. However, there’s no HTTPS support. You can use CloudFront to solve this.
Open the CloudFront console and choose Create Distribution. Click in the Origin Domain Name field, select your S3 bucket, then select Use website endpoint.
Set the Viewer Protocol Policy to Redirect HTTP to HTTPS and allow all HTTP methods. Under the Response headers policy, click Create Policy. Name it something you’ll remember and enable all the security headers.
In the Security headers section, enable each header and set the values to the defaults unless specified below:
-
Strict-Transport-Security: use default max-age and select
includeSubdomains -
X-Frame-Options:
DENY -
X-XSS-Protection:
Enabledand selectblock -
Referrer-Policy:
strict-origin-when-cross-origin -
Content-Security-Policy:
default-src 'self'; script-src 'self' 'unsafe-inline'; style-src 'self' 'unsafe-inline'; img-src 'self' data:; font-src 'self' data:; frame-ancestors 'none'; connect-src 'self' https://.auth0.com https://.herokuapp.com; frame-src 'self' https://*.auth0.com
Add a Custom header for Permissions-Policy:
-
Permissions-Policy:
geolocation=(self), microphone=(), accelerometer=(), camera=()
Select Origin override if it’s not selected for any headers by default. Click Create.
On your distribution page, refresh the Response headers policy options, and select the policy you just created.
Enter index.html near the bottom as the Default Root Object, and select Create Distribution. When the Last modified column changes from Deploying to today’s date, navigate to the domain in your browser.
| Once you’ve created your distribution, it can take 20 minutes to deploy. |
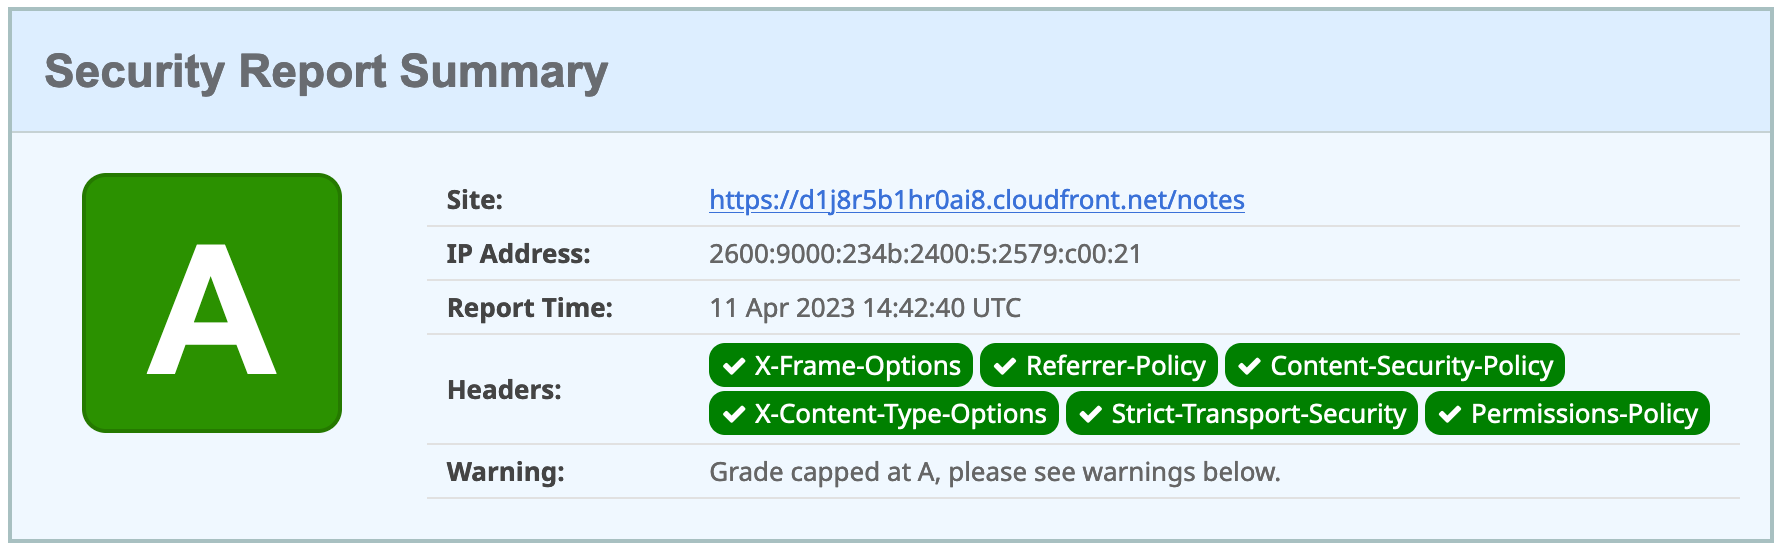
After your distribution is deployed, update your Spring Boot app on Heroku to allow your CloudFront URL:
heroku config:edit --remote herokuMake sure to append the URL to your existing ones, separating them with a comma.
ALLOWED_ORIGINS='...,https://d1j8r5b1hr0ai8.cloudfront.net'Update your Auth0 Angular app to allow the URL as a redirect, too.
Now you can authenticate to your Angular app on AWS successfully!
Summary
In this section, you learned how to upgrade Angular and Spring Boot to their latest versions and make them production-ready. You configured Auth0 to be aware of your production URLs and deployed both apps to Heroku. After you got them working on Heroku with PostgreSQL, you learned how to deploy the Angular app to Firebase, Netlify, and AWS.
You learned how to make your Angular app more secure with security headers, force HTTPS, and make each cloud provider SPA-aware.
You can download the code for this book’s examples from InfoQ. The angular-deployment directory has this chapter’s completed example.
|
In the next section, I’ll show you how to containerize and deploy your Angular and Spring Boot app with Docker. You’ll learn how to combine them into a JAR and use server-side authorization code flow (the most secure OAuth 2.0 flow). As icing on the cake, I’ll provide instructions for deploying to Heroku and Knative on Google Cloud!